
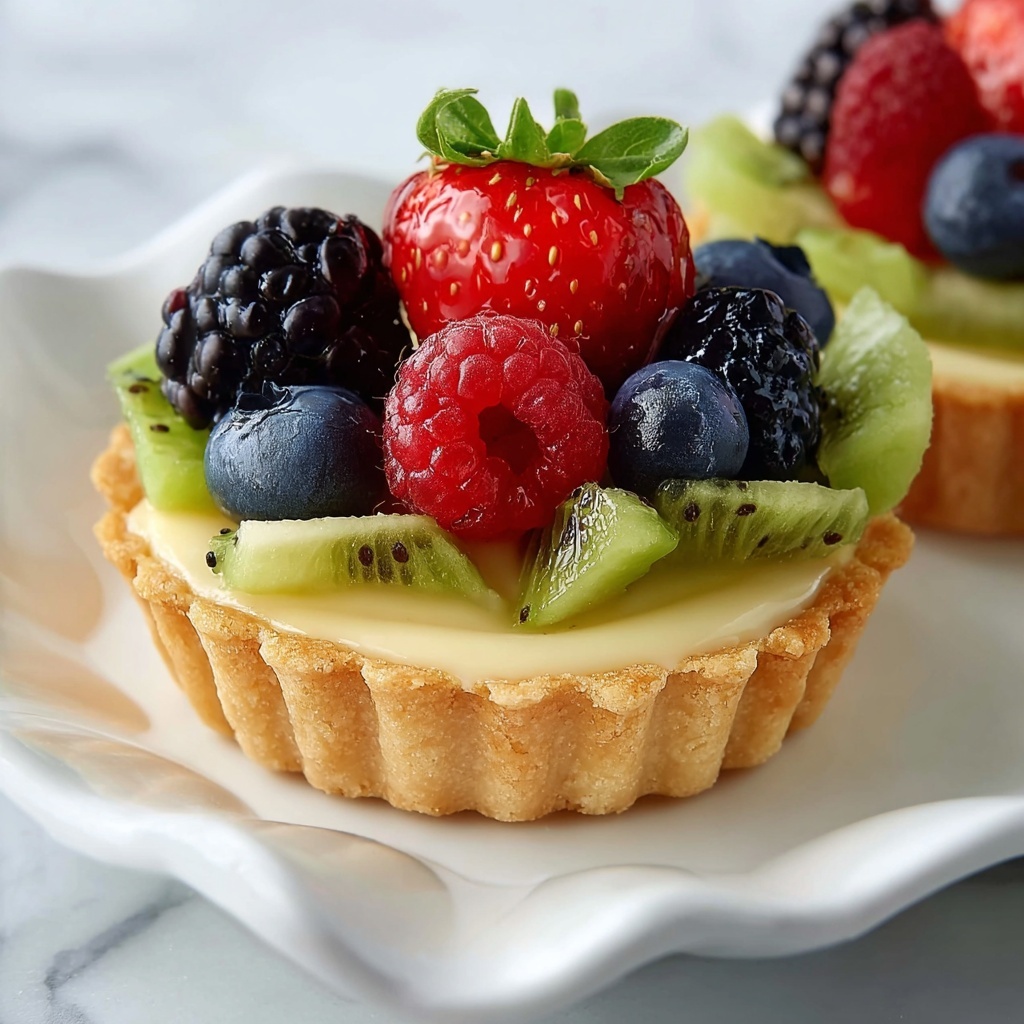
If you are looking for a delightful treat that feels as special as a bakery creation yet is simple enough to make at home, this Mini Fruit Tarts Recipe is just what you need. With a crisp, buttery crust, luscious vanilla pastry cream, and a vibrant medley of fresh fruits, these tiny tartlets hold a burst of brightness in every bite. Perfect for gatherings, tea parties, or a sweet pick-me-up, these colorful little desserts charm both the eyes and the palate.
Ingredients You’ll Need
Every ingredient in this recipe plays a crucial role in bringing together the perfect mini fruit tarts. From the rich creaminess of the pastry filling to the fresh, juicy fruits on top, each element is straightforward yet essential for creating the ideal balance of texture and flavor.
- Whole Milk (1 ½ cups): The creamy base for the pastry cream that keeps it smooth and velvety.
- Lemon rind (1 strip): Adds a hint of citrus brightness to the milk infusion.
- Egg Yolks (3): Provide richness and help thicken the pastry cream.
- Granulated Sugar (⅓ cup + ⅓ cup): Sweetens both the pastry cream and the tart dough perfectly.
- All-Purpose Flour (¼ cup + 2 cups): Key for thickening the cream and forming the crisp tart crust.
- Vanilla Extract (1 teaspoon): Adds a deep, warm sweetness that makes the pastry cream irresistible.
- Unsalted Butter (4 ounces): Makes the dough tender while giving a rich, buttery flavor.
- Lemon Zest (1 teaspoon): Infuses the dough with fresh citrus notes to complement the fruit topping.
- Large Egg (1): Binds the dough, ensuring it holds its shape beautifully.
- Pinch of Salt: Enhances all the flavors in both the crust and the filling.
- Apricot Jam (1 tablespoon): Used as a glaze to give the fruit a glossy, appetizing finish.
- Blueberries (4 ounces): Juicy and sweet berries to decorate the tarts.
- Raspberries (4 ounces): Add a pop of tartness and bright color.
- Kiwi Fruits (2): Their vibrant green and tangy flavor elevate the visual appeal and taste.
How to Make Mini Fruit Tarts Recipe
Step 1: Infuse the Milk
Start by gently heating the whole milk with a strip of lemon zest in a saucepan. Heating it until steaming allows the milk to capture a subtle citrus aroma, which will add a refreshing layer to the pastry cream without overpowering it.
Step 2: Prepare the Egg Mixture
While the milk is warming, whisk together the egg yolks, sugar, and flour until smooth. This mixture serves as the base that will thicken the custard. When you slowly combine the hot milk with this blend, you create a creamy foundation for your tarts.
Step 3: Cook the Pastry Cream
Pour the combined mixture back into the saucepan and cook it over medium heat. Constant whisking is key here to prevent lumps and ensure it thickens evenly. Once it reaches a boil, simmer for another minute – this step fully cooks the flour and stabilizes the cream.
Step 4: Chill the Pastry Cream
Transfer the pastry cream to a bowl and cover it with plastic wrap pressed directly onto the surface. This prevents a skin from forming. After cooling slightly, refrigerate until the cream is completely cold and ready to fill the tart shells.
Step 5: Cream the Butter and Sugar
Beat the room temperature butter until creamy, then add sugar and lemon zest. This combination not only sweetens the dough but infuses it with a lemony aroma that complements the fruit topping perfectly.
Step 6: Add the Egg
Lightly beating the egg before mixing it in gradually helps integrate it smoothly with the butter mixture, ensuring your dough stays tender and cohesive.
Step 7: Mix in the Flour and Salt
Use a wooden spoon to bring the flour and salt into the wet ingredients. Then knead lightly on a floured surface until the dough is soft and elastic but not sticky. Chilling the dough allows it to firm up, making it easier to roll out.
Step 8: Shape the Tart Shells
Spray mini tart pans with non-stick spray for easy removal later. Roll out half the dough between sheets of parchment paper to ¼ inch thickness, then cut circles that fit each pan. Press the dough gently into the pans, trim, and prick the bases with a fork to prevent bubbling.
Step 9: Freeze Before Baking
Pop the shaped tart shells into the freezer for 30 minutes. This step helps preserve their shape and prevents shrinking while baking.
Step 10: Bake the Tart Shells
Preheat your oven to 350ºF (180ºC) and bake the shells for 12 to 14 minutes or until the edges turn a lovely golden brown. Let them cool completely on a wire rack before filling.
Step 11: Prepare the Apricot Glaze
Heat apricot jam until liquid and strain it to remove any fruit bits. If needed, thin it with a bit of water to get a paint-like consistency perfect for brushing.
Step 12: Fill the Tart Shells
Spoon the chilled pastry cream into the cooled tartlets, spreading it evenly to create an inviting canvas for your fruit toppings.
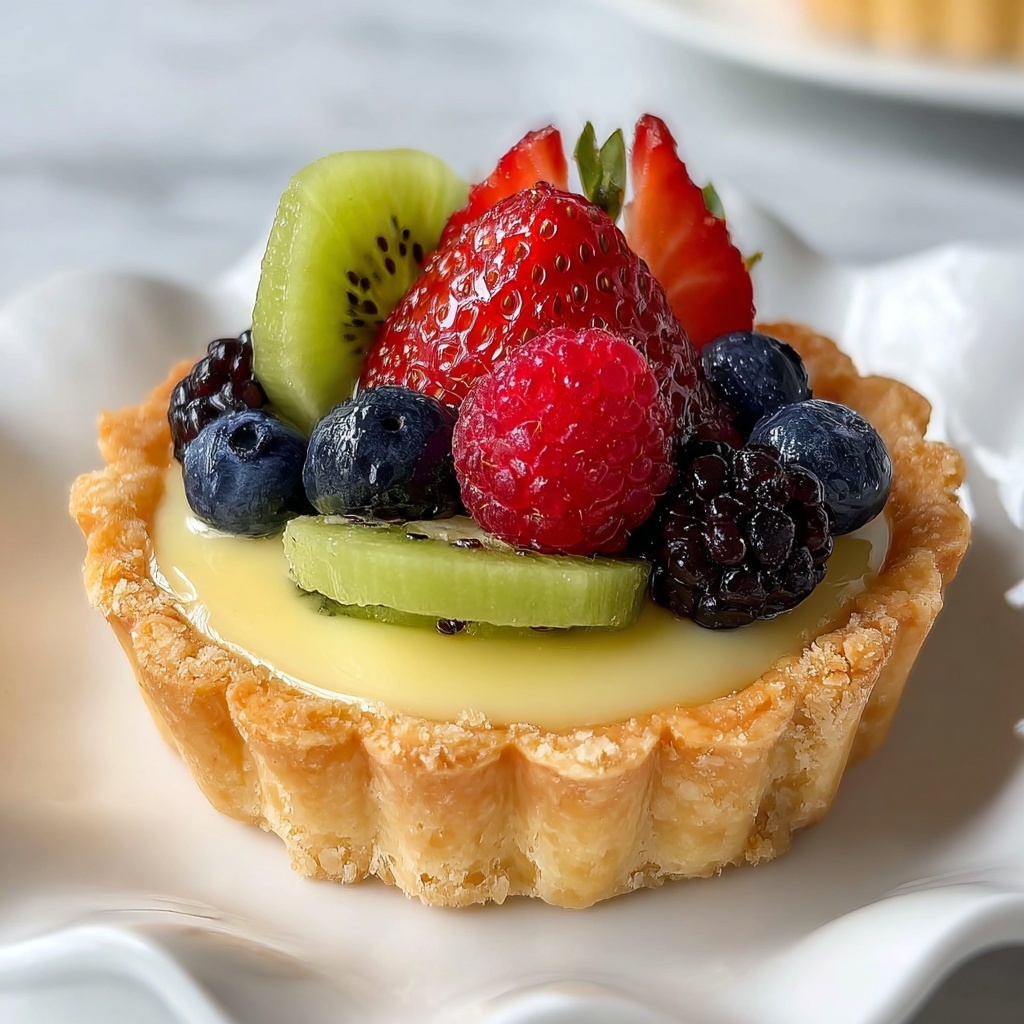
Step 13: Top with Fresh Fruit
Arrange the blueberries, raspberries, and kiwi slices artfully on the pastry cream. Gently press them into place so they stay put, creating a stunning mosaic of colors and flavors.
Step 14: Apply the Glaze
Use a pastry brush to lightly coat the fruits with the apricot glaze. This step not only adds a shiny finish but seals the fruit to keep it fresh and vibrant longer.
Step 15: Chill Until Serving
Place the finished Mini Fruit Tarts in the refrigerator until you’re ready to enjoy their fresh, fruity charm.
How to Serve Mini Fruit Tarts Recipe
Garnishes
For an extra touch of elegance, consider garnishing your mini fruit tarts with a sprinkle of finely chopped mint or a dusting of powdered sugar. These additions enhance both flavor and presentation, making your tarts look as delightful as they taste.
Side Dishes
Serve your mini fruit tarts alongside a light, fruity salad or a refreshing iced tea. Their sweetness pairs beautifully with crisp, slightly savory accompaniments, creating a well-rounded dessert experience that feels surprisingly sophisticated.
Creative Ways to Present
Try arranging your Mini Fruit Tarts Recipe on a decorative platter layered with edible flowers or fresh sprigs of herbs. Presenting them on a tiered cake stand is perfect for parties, turning these small treats into the centerpiece everyone will rave about.
Make Ahead and Storage
Storing Leftovers
Store any leftover mini fruit tarts in an airtight container in the refrigerator. They will stay fresh for up to 2 days, but best enjoyed within the first day to ensure the crust remains crisp and the fruit stays vibrant.
Freezing
Freezing these tarts is not recommended once assembled because the fruit and pastry cream can suffer in texture. However, you can freeze the baked tart shells separately for up to one month, thawing them before filling and serving.
Reheating
If you need to warm the tart shells before filling, reheat them gently in a low oven (around 300ºF / 150ºC) for a few minutes. Avoid reheating filled tarts to maintain the integrity of the cream and fruit.
FAQs
Can I use other fruits in this Mini Fruit Tarts Recipe?
Absolutely! Feel free to customize your fruit selection based on what’s in season or your personal preference. Strawberries, mango slices, or even pomegranate seeds work wonderfully and bring their unique flavors to the tart.
How long does it take to make these mini fruit tarts?
While the total prep time is about an hour plus 30 minutes baking, the process includes chilling periods for the dough and pastry cream. Overall, expect around two and a half hours from start to finish, allowing some time to relax between steps.
Why is the tart dough chilled before baking?
Chilling the dough firms up the butter, which helps prevent the crust from shrinking while baking and keeps it tender and flaky. It also makes the dough easier to handle and shape.
Can I make the pastry cream ahead of time?
Yes, the pastry cream can be made a day ahead. Just cover it tightly with plastic wrap pressed onto the surface and refrigerate until you’re ready to assemble the tarts.
What is the best way to prevent the tart crust from becoming soggy?
Blind baking the tart shells and chilling them before filling are key. Additionally, glazing the fruit adds a barrier to slow moisture soaking into the crust, keeping it crisp longer.
Final Thoughts
This Mini Fruit Tarts Recipe is an absolute joy to make and share. Each step brings you closer to a beautifully balanced dessert that looks stunning and tastes like a dream. Whether you’re impressing guests or indulging yourself, these tartlets will quickly become a cherished favorite. I encourage you to give this recipe a go and watch your kitchen fill with the irresistible scent of fresh fruit and lemony vanilla goodness.
Print
Mini Fruit Tarts Recipe
- Prep Time: 1 hour
- Cook Time: 30 minutes
- Total Time: 1 hour 30 minutes
- Yield: 16 tartlets
- Category: Dessert
- Method: Baking
- Cuisine: French
- Diet: Vegetarian
Description
These Mini Fruit Tarts feature crisp buttery tart shells filled with smooth, creamy Italian pastry cream and topped with fresh blueberries, raspberries, and kiwi slices. A glossy apricot glaze finishes the tarts, adding sweetness and shine. Perfect for an elegant dessert or a fruity snack, these tartlets combine a tender crust, luscious filling, and vibrant fresh fruit for a delightful treat.
Ingredients
Pastry Cream
- 1 ½ cups (354 ml) whole milk
- 1 strip lemon rind
- 3 egg yolks
- ⅓ cup (66 g) granulated sugar
- ¼ cup (30 g) all-purpose flour
- 1 teaspoon vanilla extract
Tart Dough
- 4 ounces (120 g) unsalted butter, room temperature
- ⅓ cup (66 g) granulated sugar
- 1 teaspoon finely grated lemon zest
- 1 large egg, room temperature
- 2 cups (250 g) all-purpose flour
- Pinch of salt
Glaze and Toppings
- 1 tablespoon apricot jam or conserve
- Water as needed
- 4 oz (115 g) blueberries
- 4 oz (115 g) raspberries
- 2 kiwi fruits
Instructions
- Heat Milk with Lemon Rind: Heat the milk and a strip of lemon zest in a medium saucepan over medium heat until steaming but not boiling. Remove from heat to infuse the milk with lemon aroma.
- Whisk Eggs, Sugar, and Flour: In a bowl, whisk the egg yolks, sugar, and flour until smooth to create a base for the pastry cream.
- Combine Milk and Egg Mixture: Slowly whisk the hot milk into the egg mixture to temper the eggs. Stir in the vanilla extract for flavor.
- Cook Pastry Cream: Pour the mixture back into the saucepan over medium heat. Whisk constantly until it thickens and comes to a boil. Simmer for 1 minute to cook out raw flour taste and thicken further.
- Cool Pastry Cream: Pour the pastry cream into a bowl, cover with plastic wrap pressed directly onto the surface to prevent skin, and let cool 10-15 minutes before chilling in the refrigerator until cold.
- Prepare Tart Dough – Cream Butter, Sugar, Zest: Beat the butter with an electric mixer until creamy. Add the sugar and lemon zest and beat until well combined.
- Add Egg to Dough: Lightly beat the egg, then gradually add it to the butter mixture, mixing well after each addition to form a smooth batter.
- Add Dry Ingredients and Knead: Use a wooden spoon to incorporate the flour and salt until combined. Turn dough onto a floured surface and knead lightly until smooth. Wrap in plastic and chill for 30 minutes.
- Prepare Tart Shells: Spray mini tart pans with non-stick spray. Roll out half the dough between parchment paper to about ¼ inch (5 mm) thickness. Cut circles to fit the tart pans.
- Form and Freeze Tart Shells: Press dough circles into pans, trim edges, and prick bases with a fork to prevent puffing. Freeze for 30 minutes for better shape retention during baking.
- Bake Tart Shells: Preheat oven to 350ºF (180ºC). Bake tart shells for 12-14 minutes or until golden around edges. Cool completely on wire rack.
- Prepare Apricot Glaze: Heat apricot jam in the microwave until liquid. Pass through a fine mesh strainer to remove solids. Thin with water as needed for a brushable consistency.
- Fill Tart Shells: Spoon chilled pastry cream evenly into cooled tart shells.
- Arrange Fresh Fruit: Slice kiwis and arrange blueberries, raspberries, and kiwi slices on top of the pastry cream, pressing gently into place for an attractive presentation.
- Brush Fruit with Glaze: Lightly brush the fruit with the apricot glaze to add shine and a sweet finish.
- Chill and Serve: Refrigerate the tarts until ready to serve, allowing flavors to meld and keeping the shells crisp.
Notes
- Pressing plastic wrap directly onto pastry cream prevents a skin from forming.
- Freezing tart shells before baking helps maintain their shape and reduces shrinkage.
- Use room temperature ingredients for easier mixing and better dough texture.
- Adjust apricot glaze consistency with water to ensure it brushes easily without being too runny.
- These tartlets are best served the same day but can be refrigerated for up to 2 days.

