
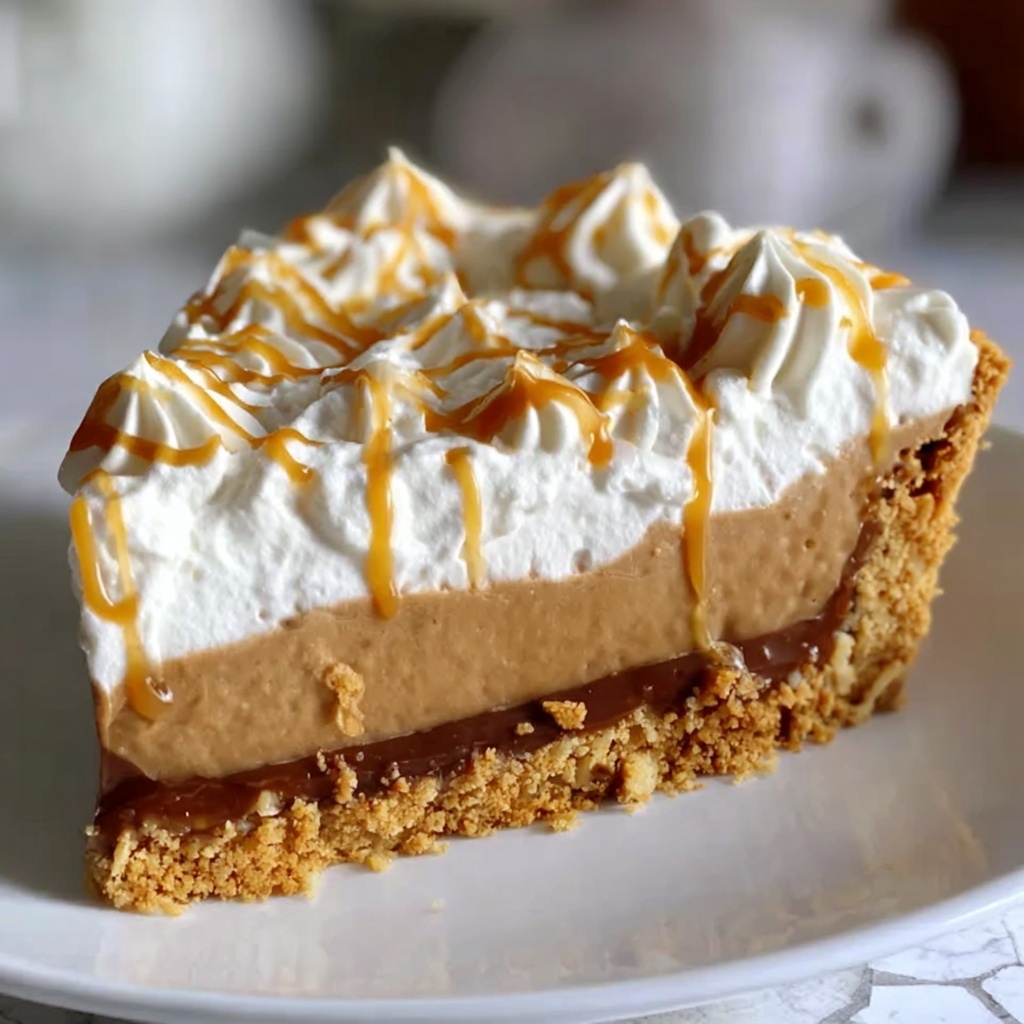
If you are looking for a dessert that feels indulgent but comes together effortlessly, this No Bake Peanut Butter Pie Recipe is an absolute game-changer. Creamy, dreamy, and packed with that classic peanut butter flavor we all love, this pie combines smooth peanut butter, fluffy whipped topping, and a crisp graham cracker crust for a perfect balance of textures. Whether it’s a last-minute treat or a party centerpiece, this pie is guaranteed to bring smiles without turning on the oven.
Ingredients You’ll Need
The beauty of this pie lies in its simplicity. Each ingredient plays a crucial role, whether it’s adding creaminess, sweetness, or that irresistible peanut butter punch, making the whole dessert come alive with flavor and texture.
- 1 cup creamy peanut butter: Choose a smooth variety for the perfect velvety filling.
- 8 oz cream cheese, softened: This adds richness and a slight tang that complements the peanut butter.
- 1 cup powdered sugar: Sweetens and balances the savory notes perfectly.
- 1 tsp vanilla extract: Brings warmth and depth to the flavor profile.
- 8 oz whipped topping (like Cool Whip), thawed: Lightens the mixture to create a fluffy texture.
- 1 pre-made graham cracker crust: Provides a crunchy, buttery base without any fuss.
- Optional toppings (chocolate shavings, whipped cream, crushed peanuts): Adds texture and an extra layer of indulgence.
How to Make No Bake Peanut Butter Pie Recipe
Step 1: Mix Peanut Butter and Cream Cheese
Begin by beating together the creamy peanut butter and softened cream cheese. This step is crucial for creating a smooth and silky base that will define the pie’s luscious mouthfeel. Make sure both ingredients are well combined before moving on.
Step 2: Sweeten the Mixture
Add the powdered sugar and vanilla extract to your peanut butter and cream cheese blend. These ingredients give the pie its signature sweet and aromatic notes, so take a moment to mix thoroughly into a uniform batter without any lumps.
Step 3: Fold in Whipped Topping
Gently fold in the thawed whipped topping. Folding, rather than whipping vigorously, keeps the filling light and airy. This is what transforms the pie from dense to delightfully fluffy, making every bite cloud-like.
Step 4: Fill the Crust
Pour the peanut butter filling into the pre-made graham cracker crust. Use a spatula to spread it evenly, ensuring the filling reaches all edges for a consistent taste and texture throughout the pie.
Step 5: Chill Until Set
Refrigerate the pie for at least 2 to 3 hours. This chilling time is essential as it allows the flavors to meld beautifully and the filling to firm up, giving you clean slices that hold their shape perfectly.
Step 6: Add Optional Toppings
Before serving, feel free to sprinkle chocolate shavings, dollop on extra whipped cream, or scatter some crushed peanuts. These toppings add dimension and make the presentation more inviting, boosting both texture and flavor.
How to Serve No Bake Peanut Butter Pie Recipe
Garnishes
Simple garnishes like chocolate curls or chopped peanuts elevate this pie from everyday to special occasion-worthy. Whipped cream adds creaminess and an inviting lightness on top, making each slice extra appealing and indulgent.
Side Dishes
This pie pairs wonderfully with fresh berries, which offer a tangy contrast to the richness, or even a cup of black coffee or a bold red wine to balance out the sweet, creamy notes. These sides turn your dessert into a thoughtful, well-rounded experience.
Creative Ways to Present
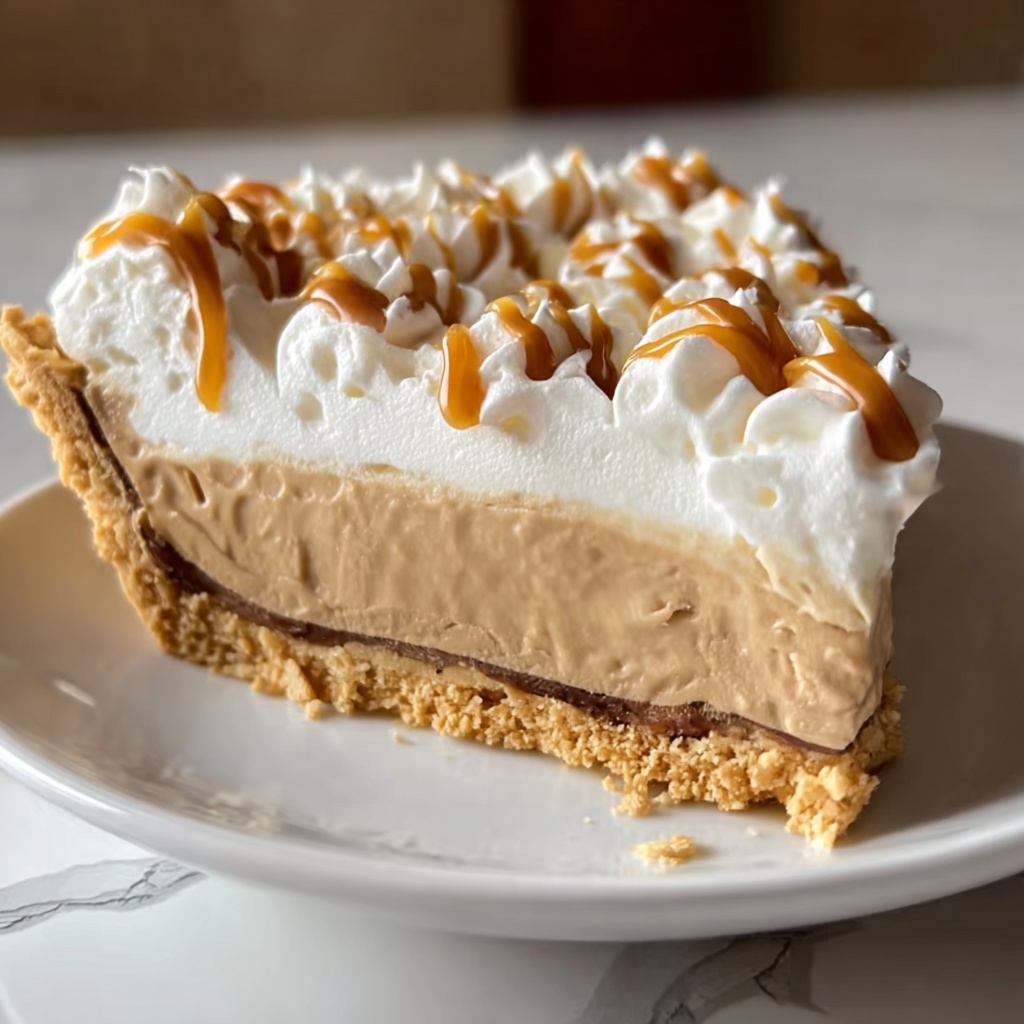
Serve individual servings in small clear glasses for a layered dessert effect, or place a slice on a vibrant plate with a drizzle of caramel or chocolate sauce. These creative touches can really wow guests and make your no bake peanut butter pie recipe feel extra celebratory.
Make Ahead and Storage
Storing Leftovers
Leftover pie can be covered tightly with plastic wrap or stored in an airtight container in the refrigerator. It will maintain its texture and flavor best for up to 3 days, so plan accordingly for maximum freshness.
Freezing
This pie freezes well if you want to save it for later. Wrap it securely in plastic wrap and aluminum foil before freezing. Thaw in the fridge overnight before serving, preserving that creamy texture without sacrificing taste.
Reheating
Since this is a no bake dessert, reheating isn’t necessary. Simply allow the pie to come to refrigerator temperature before slicing, ensuring a clean cut and perfect consistency each time you serve.
FAQs
Can I use crunchy peanut butter instead of creamy?
Absolutely! Crunchy peanut butter will add extra texture to the filling, giving each bite a delightful surprise. Just be aware it may slightly change the smoothness of the pie.
Is it necessary to use a pre-made graham cracker crust?
Using a pre-made crust keeps things simple, but you can easily make your own. A homemade crust using crushed graham crackers and melted butter can add a personal touch to your no bake peanut butter pie recipe.
How long does the pie need to set before serving?
A minimum of 2 to 3 hours in the fridge is essential for the filling to firm up and the flavors to blend perfectly. For best results, aim for at least this chilling time.
Can I substitute whipped topping with homemade whipped cream?
Yes! Homemade whipped cream can offer a fresher flavor. Just be sure to fold it in gently to keep the filling light and fluffy.
What are some fun variations of this No Bake Peanut Butter Pie Recipe?
Try swirling in melted chocolate, adding chopped bananas on top, or mixing in some mini chocolate chips into the filling. These tweaks personalize the pie while keeping its beloved peanut butter essence.
Final Thoughts
This No Bake Peanut Butter Pie Recipe is one of those feel-good desserts that combines ease with indulgence so effortlessly, it becomes an instant favorite. Whether you’re a peanut butter enthusiast or just love desserts that come together quickly without sacrificing flavor, this pie is your new best friend. Give it a try and prepare for everyone’s requests for seconds and the praise that follows!
Print
No Bake Peanut Butter Pie Recipe
- Prep Time: 10 minutes
- Cook Time: 0 minutes
- Total Time: 3 hours 10 minutes
- Yield: 8 slices
- Category: Dessert
- Method: No-Cook
- Cuisine: American
Description
This No Bake Peanut Butter Pie is a creamy, delicious dessert perfect for peanut butter lovers. Made with a smooth peanut butter and cream cheese filling swirled with whipped topping and nestled in a crunchy graham cracker crust, it requires no baking and sets quickly in the fridge. Ideal for quick gatherings or a simple indulgence, it’s easy to prepare and can be topped with chocolate shavings, whipped cream, or crushed peanuts for extra flair.
Ingredients
Filling
- 1 cup creamy peanut butter
- 8 oz cream cheese, softened
- 1 cup powdered sugar
- 1 tsp vanilla extract
- 8 oz whipped topping (like Cool Whip), thawed
Crust
- 1 pre-made graham cracker crust
Optional Toppings
- Chocolate shavings
- Whipped cream
- Crushed peanuts
Instructions
- Prepare the filling: In a large mixing bowl, beat together the peanut butter and softened cream cheese until smooth and creamy. Add the powdered sugar and vanilla extract, mixing until well combined.
- Incorporate whipped topping: Gently fold in the whipped topping until the mixture is light and fluffy, ensuring an even, smooth texture for the filling.
- Fill the crust: Pour the peanut butter filling into the pre-made graham cracker crust, spreading it evenly with a spatula for a smooth surface.
- Chill to set: Refrigerate the pie for at least 2 to 3 hours to allow the filling to firm up and the flavors to meld.
- Add toppings and serve: Before serving, garnish with optional toppings like chocolate shavings, whipped cream, or crushed peanuts to enhance flavor and presentation.
Notes
- Make sure the cream cheese is softened to room temperature for easier mixing and a smoother filling.
- Use a spatula to fold whipped topping gently to maintain its fluffiness.
- Refrigerate the pie well to ensure it sets properly and slices cleanly.
- This pie is best served chilled and can be stored covered in the refrigerator for up to 3 days.
- For a crunchy texture contrast, sprinkle chopped peanuts just before serving.
