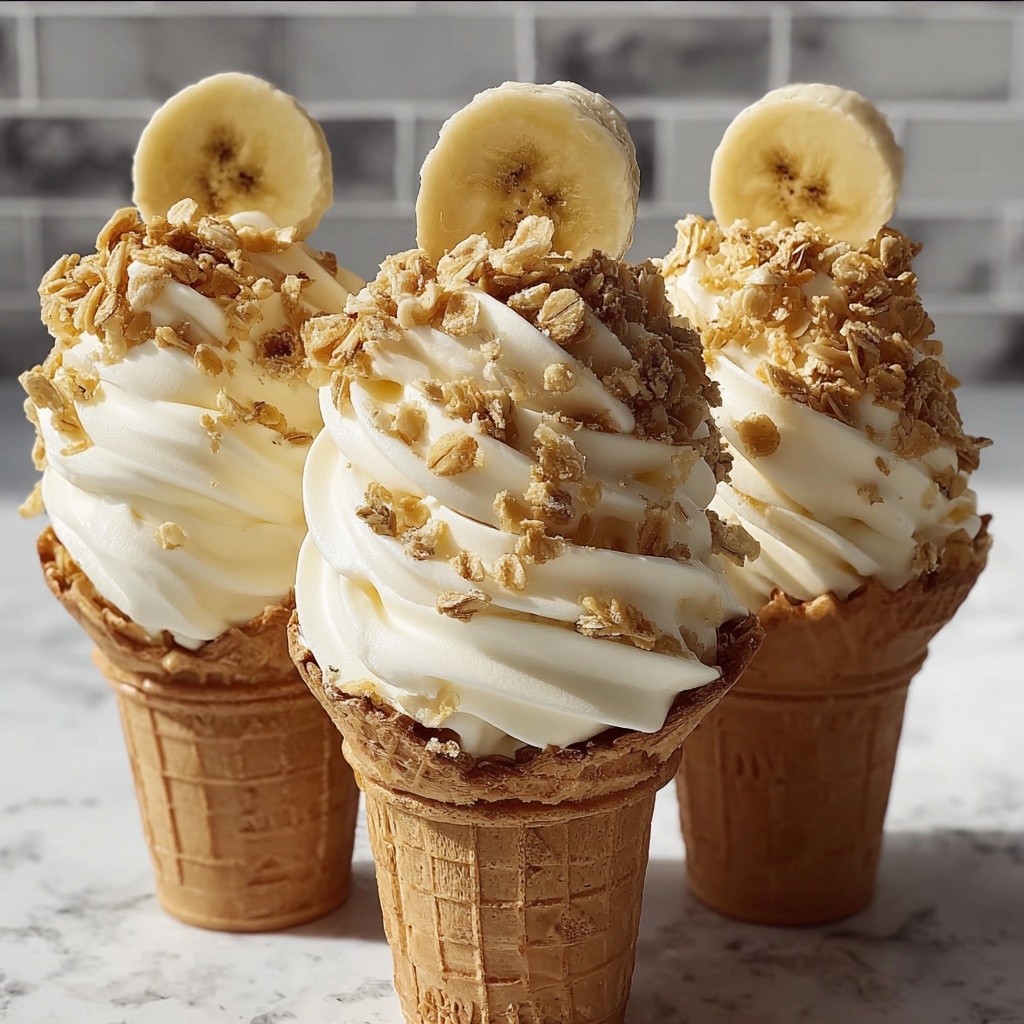
If you’re a fan of creamy, dreamy desserts with a fun twist, the Banana Pudding Cheesecake Cones Recipe is an absolute must-try. Imagine the luscious richness of classic banana pudding merged with the tangy smoothness of cheesecake, all nestled inside a crisp, sweet sugar cone. This delightful treat is not only irresistibly delicious but also a charming way to serve dessert that brings smiles and oohs at any gathering. Whether for a warm afternoon snack or a party showstopper, these cones elevate banana pudding to a whole new level of enjoyment.
Ingredients You’ll Need
The magic behind this Banana Pudding Cheesecake Cones Recipe lies in its simple yet indispensable ingredients. Each component plays a vital role, from the creamy texture to the perfect balance of sweetness and a satisfying crunch.
- Cream cheese (8 oz): This provides the smooth, creamy base with a slight tang that sets the cheesecake flavor apart.
- Granulated sugar (1/2 cup): Adds just the right amount of sweetness to balance the tanginess and banana flavor.
- Vanilla extract (1 tsp): A small splash that enhances every other ingredient’s natural flavors.
- Heavy cream (1 cup): Whipped into stiff peaks, it gives the dessert its fluffy, airy texture.
- Ripe bananas (2, mashed): The heart of the dessert, providing natural sweetness and that unmistakable banana pudding essence.
- Vanilla wafers (1 cup, crushed): Adds crunch and a nostalgic touch typical of banana pudding.
- Sugar cones (6): These serve as the fun and edible containers that hold our creamy filling and add a delightful crunch.
How to Make Banana Pudding Cheesecake Cones Recipe
Step 1: Prepare the Cream Cheese Mixture
Begin by beating the softened cream cheese, granulated sugar, and vanilla extract together in a large mixing bowl until the blend is perfectly smooth and creamy. This will serve as the luscious foundation for the dessert.
Step 2: Whip the Heavy Cream
In a separate bowl, whip your heavy cream until it reaches stiff peaks. The whipped cream is essential as it brings airiness and lightness, preventing the mixture from becoming too dense.
Step 3: Combine the Mixtures
Gently fold the whipped cream into the cream cheese mixture. Take your time here to keep the airy texture intact while ensuring a well-blended, creamy mixture.
Step 4: Add Bananas and Vanilla Wafers
Carefully fold in mashed bananas and crushed vanilla wafers. This is where you’ll get that irresistible banana pudding flavor paired with delicate crunches representing the classic dessert’s soul.
Step 5: Fill the Sugar Cones
Spoon the cheesecake banana pudding mixture into each sugar cone. Press gently as you fill to pack the mixture evenly, making sure every bite is full of flavor and texture.
Step 6: Chill to Set
Place the filled cones upright in the refrigerator for at least 1 hour. This step lets the filling firm up just enough, so the cones hold their shape while the flavors meld beautifully together.
Step 7: Serve and Savor
Once chilled, serve the Banana Pudding Cheesecake Cones Recipe right from the fridge for a refreshing and indulgent dessert that’s hard to put down.
How to Serve Banana Pudding Cheesecake Cones Recipe
Garnishes
To add a little extra sparkle, consider topping your cones with whipped cream swirls or a sprinkle of crushed vanilla wafers right before serving. Fresh banana slices or a drizzle of caramel sauce can elevate the appearance and taste even further, delighting both eyes and palate.
Side Dishes
Serve these cones alongside a simple fruit salad or a light, citrusy sorbet. The bright, refreshing sides contrast wonderfully with the sweet, creamy banana pudding cheesecake, offering a balanced and satisfying dessert experience.
Creative Ways to Present
Try placing the cones in colorful cone holders or stand them upright in a shallow box filled with crushed ice to keep them cool at a summer party. For a whimsical touch, wrap the bottom with decorative paper or ribbon, turning dessert time into a festive occasion everyone will remember.
Make Ahead and Storage
Storing Leftovers
If you happen to have any leftovers, store them in an airtight container in the refrigerator. The cones may soften slightly overnight, but the flavors remain just as delicious. For best texture, enjoy within 1-2 days.
Freezing
Freezing is possible but not ideal for the sugar cones, as they can become soggy upon thawing. Instead, freeze the leftover cheesecake banana pudding mixture in a separate container for up to one month. Thaw in the refrigerator before repurposing as a dip or filling.
Reheating
This dessert is best enjoyed cold, so reheating is not recommended. The chilled, creamy texture is part of what makes the Banana Pudding Cheesecake Cones Recipe so irresistible, so keep it cool and fresh for every bite.
FAQs
Can I use plant-based alternatives for cream cheese and heavy cream?
Absolutely! Vegan cream cheese and coconut-based whipping cream work well as substitutes. Just make sure to whip the cream thoroughly and choose ripe bananas for natural sweetness.
How ripe should the bananas be?
The bananas should be very ripe with plenty of brown spots. This ensures they are sweet and soft, which is perfect for mixing into the cheesecake base and giving the dessert that classic banana pudding flavor.
Can I make this recipe gluten-free?
Yes! Simply swap the vanilla wafers and sugar cones for gluten-free versions available at most grocery stores. The rest of the recipe remains the same, preserving all that delicious flavor.
Is there a way to make the cones less messy while eating?
To minimize mess, you can wrap each cone’s bottom half in a small piece of parchment or wax paper, creating a handy grip. Serve the cones in a stand or sturdy holder to keep them upright and secure.
How long does the filling keep in the fridge?
The filling stays fresh and tasty for about 2 days when stored in an airtight container. For optimum taste and texture, it’s best enjoyed as soon as possible after preparation.
Final Thoughts
If you’re looking for a sweet and fun way to impress your friends and family, the Banana Pudding Cheesecake Cones Recipe is an absolute winner. Easy to make and bursting with classic flavors in an unexpected presentation, it’s a dessert that brings smiles and happy hearts all around. Give it a try and watch how these cones become your new favorite treat to share!
Print
Banana Pudding Cheesecake Cones Recipe
- Prep Time: 15 minutes
- Cook Time: 0 minutes
- Total Time: 1 hour 15 minutes
- Yield: 6 servings
- Category: Dessert
- Method: No-Cook
- Cuisine: American
Description
Delight in these Banana Pudding Cheesecake Cones, a fun and portable dessert combining creamy cheesecake filling with ripe bananas and crunchy vanilla wafer crumbs, all served in crispy sugar cones for a unique twist on classic banana pudding.
Ingredients
Cheesecake Filling
- 1 package (8 oz) cream cheese, softened
- 1/2 cup granulated sugar
- 1 tsp vanilla extract
- 1 cup heavy cream
- 2 ripe bananas, mashed
- 1 cup vanilla wafers, crushed
Other
- 6 sugar cones
Instructions
- Prepare Cheesecake Base: In a large mixing bowl, beat the softened cream cheese with granulated sugar and vanilla extract until the mixture is smooth and creamy, ensuring there are no lumps.
- Whip Cream: In a separate bowl, whip the heavy cream until stiff peaks form, providing a light texture that will be folded into the cheesecake base.
- Combine Mixtures: Gently fold the whipped cream into the cream cheese mixture, taking care not to deflate the whipped cream, to incorporate air and create a fluffy texture.
- Add Bananas and Vanilla Wafers: Carefully fold in the mashed ripe bananas and the crushed vanilla wafers until evenly combined, adding flavor and texture to the filling.
- Fill Sugar Cones: Spoon the cheesecake mixture into each sugar cone, pressing gently to pack the filling without breaking the cones.
- Chill to Set: Place the filled cones upright in the refrigerator for at least 1 hour to allow the cheesecake filling to set and the flavors to meld.
- Serve: Enjoy the Banana Pudding Cheesecake Cones chilled for a refreshing and fun dessert.
Notes
- Ensure the cream cheese is fully softened for easier mixing and a smoother filling.
- Use ripe bananas to add natural sweetness and creaminess.
- Folding gently preserves the airiness of the whipped cream, making the filling light and fluffy.
- Serve immediately after chilling to keep the sugar cones crisp.
- Optional: Garnish with additional crushed vanilla wafers or banana slices before serving for extra flavor and presentation.


