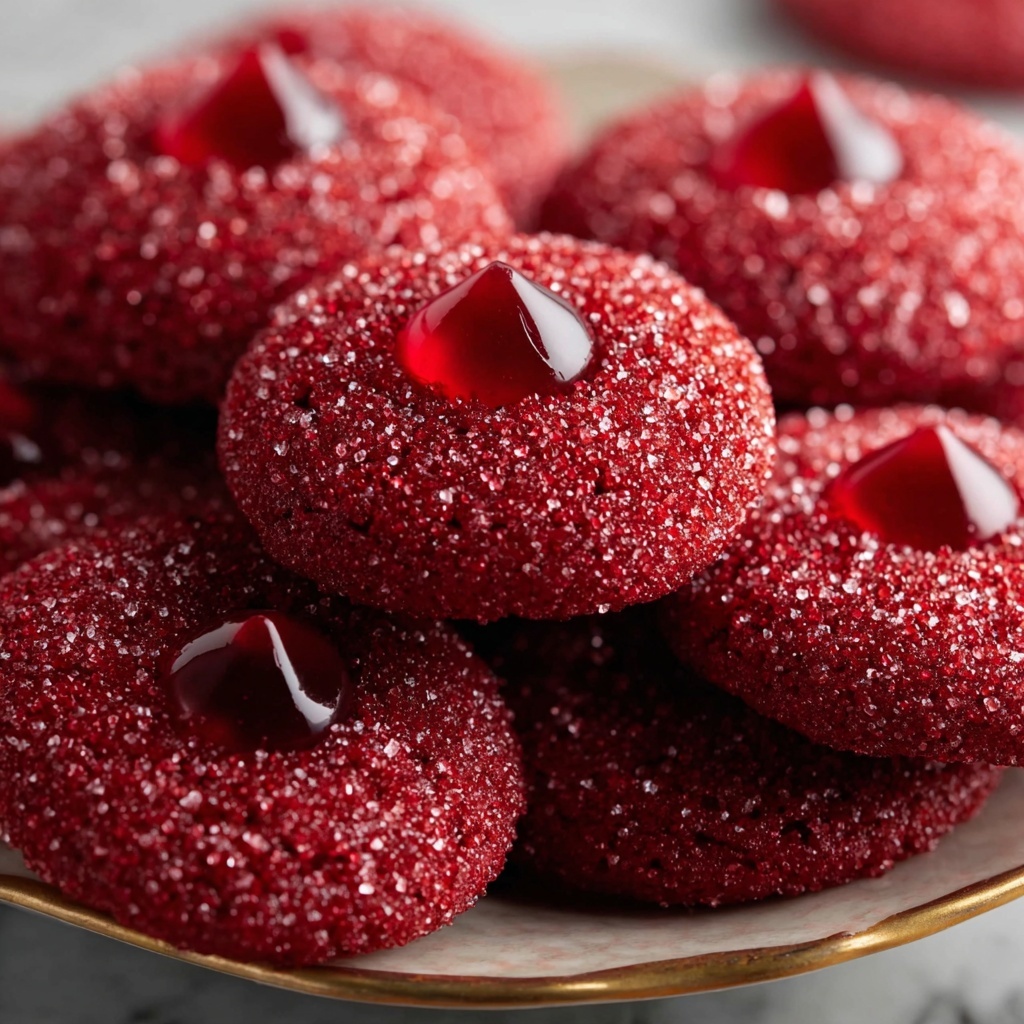
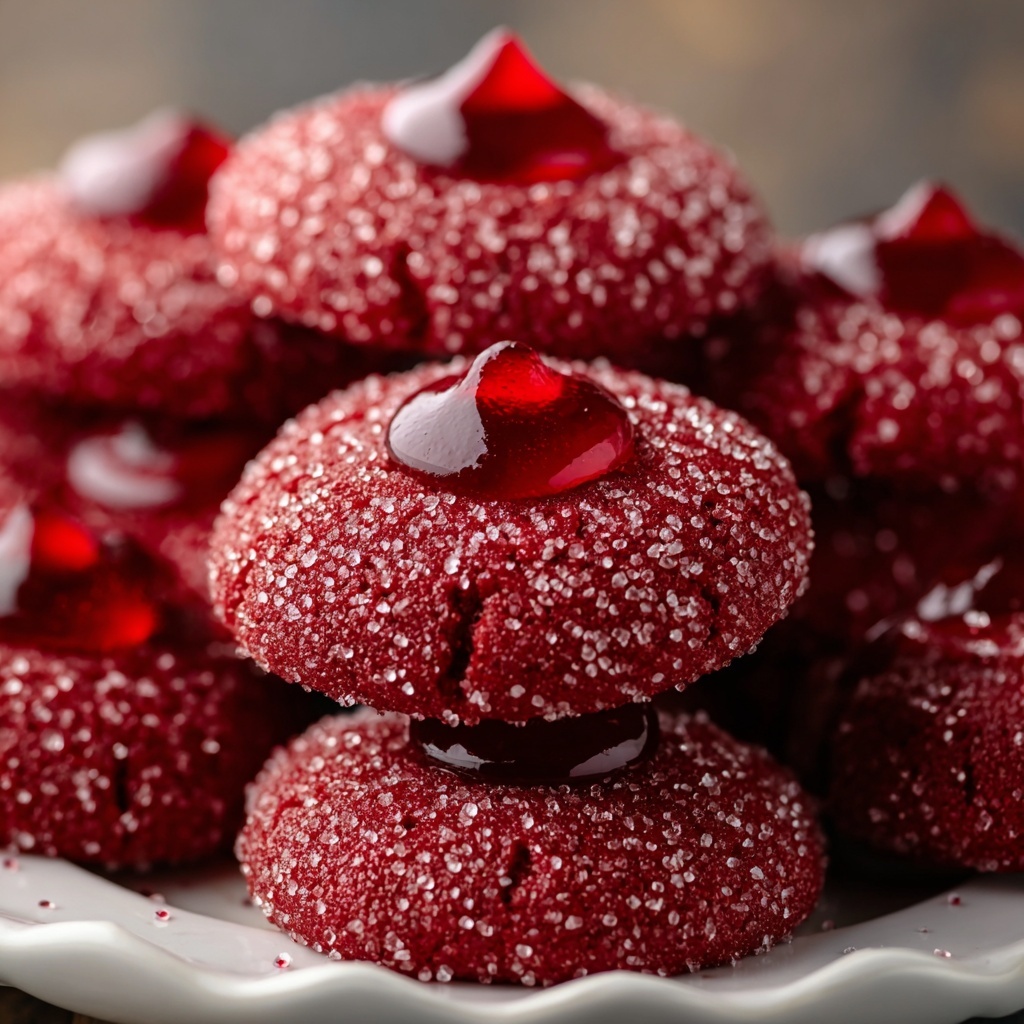
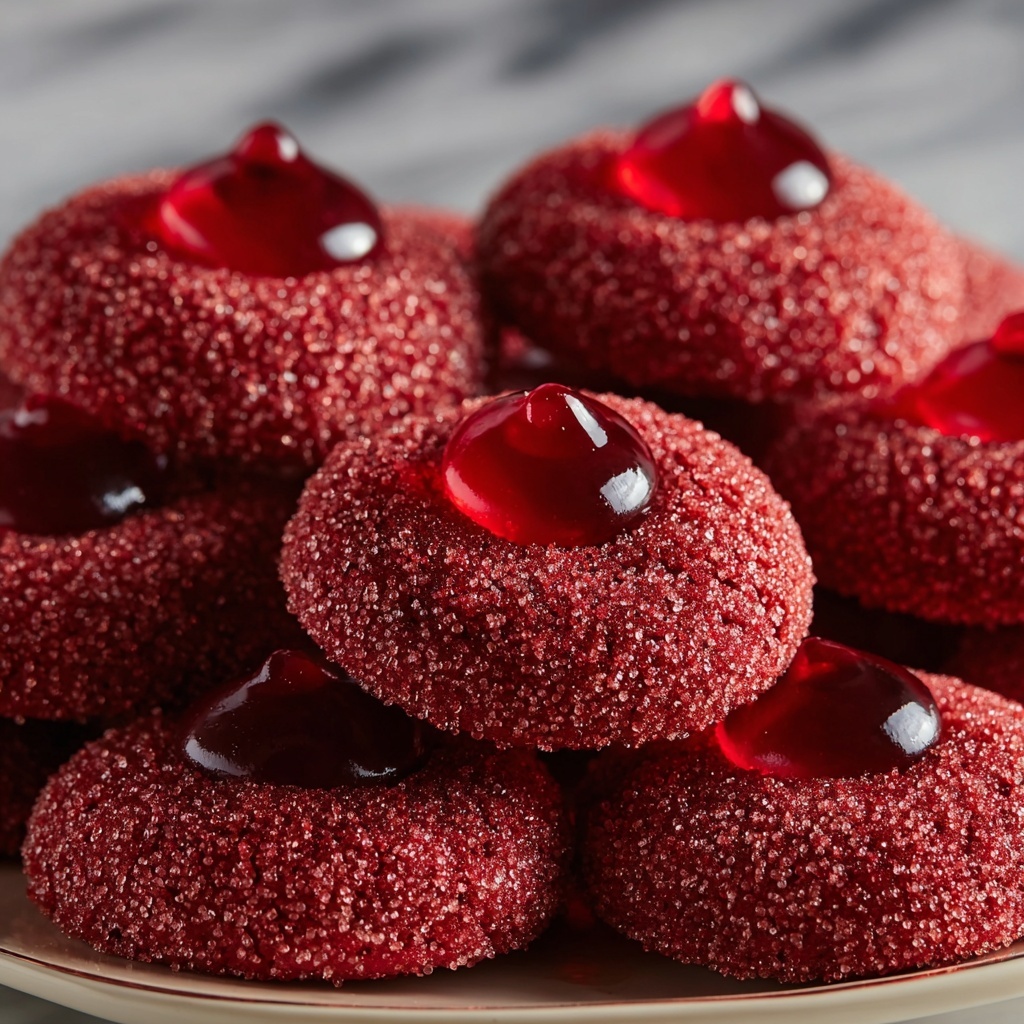
If you have a hankering for something both classic and absolutely irresistible, the Hershey’s Red Velvet Blossoms Cookies Recipe is the perfect treat to elevate your cookie game. These cookies bring together the subtle cocoa flavor of red velvet with the soft, tender texture of a well-made cookie, crowned with a melt-in-your-mouth Hershey’s Kiss. Whether for holiday gatherings, a special occasion, or just because you deserve a sweet indulgence, these cookies deliver a delightful combination of festive color, rich flavor, and charming presentation that everyone will adore.
Ingredients You’ll Need
These simple ingredients come together to create the perfect balance of taste, texture, and vibrant red color that define Hershey’s Red Velvet Blossoms Cookies Recipe. Each component plays a key role, from the cocoa powder giving a touch of richness to the powdered sugar ensuring a sweet, delicate finish.
- 2 1/4 cups all-purpose flour: Provides structure and creates a tender crumb for the cookies.
- 1 tablespoon cocoa powder: Adds a subtle chocolatey depth essential to red velvet.
- 1 teaspoon baking soda: Helps the cookies rise just enough for a soft texture.
- 1/2 teaspoon salt: Balances sweetness and enhances the overall flavor.
- 1/2 cup unsalted butter, softened: Brings richness and moisture to every bite.
- 1 cup sugar: Sweetens and contributes to the cookie’s chewy texture.
- 1 large egg: Binds the dough together and adds tenderness.
- 1 tablespoon red food coloring: Gives the signature vibrant red hue that’s so eye-catching.
- 1 teaspoon vanilla extract: Adds warmth and depth to the cookie’s flavor.
- 1/2 cup powdered sugar: Used to roll the dough balls, giving a beautiful, crackled finish.
- 30 Hershey’s Kisses, unwrapped: The crowning glory that melts into the centers after baking.
How to Make Hershey’s Red Velvet Blossoms Cookies Recipe
Step 1: Preheat Your Oven
Start by setting your oven to 350°F (175°C) so it’s perfectly heated when the dough is ready. Having the temperature just right is crucial for cookies to bake evenly and develop their soft, chewy texture.
Step 2: Mix the Dry Ingredients
In a medium bowl, whisk together the all-purpose flour, cocoa powder, baking soda, and salt. This step is important to distribute everything evenly so the cookies have consistent flavor and texture throughout.
Step 3: Cream Butter and Sugar
Using a separate large bowl, beat the softened unsalted butter and sugar together until the mixture becomes light, fluffy, and creamy. This process incorporates air that will make your cookies tender and irresistibly soft.
Step 4: Add Egg and Color
Now mix in the egg, red food coloring, and vanilla extract to your creamed mixture. Combine everything thoroughly so the dough has that iconic red velvet look and a lovely vanilla undertone to balance the cocoa.
Step 5: Combine the Mixtures
Gradually add your dry ingredients into the wet mixture, stirring gently until just combined. It’s best not to overmix here because too much stirring can make the cookies tough instead of tender and soft.
Step 6: Roll the Cookies
Use a tablespoon to scoop out dough portions, then roll each into a smooth ball. Next, roll these balls in powdered sugar, which will create a charming crackled effect as they bake and enhance sweetness on every bite.
Step 7: Bake the Cookies
Place the dough balls evenly spaced on a parchment-lined baking sheet, then pop them into the preheated oven. Bake for 10 to 12 minutes until the edges are set but the cookies still look slightly soft in the middle, ensuring a perfect chewy texture.
Step 8: Add the Kisses
Once you remove the cookies from the oven, immediately press a Hershey’s Kiss into the center of each cookie. The heat will soften the Kiss so it nestles perfectly into the cookie base while you finish cooling.
Step 9: Cool Them Down
Allow the cookies to cool on the baking sheet for a few minutes after adding the Kisses, then transfer them to a wire rack to cool completely. This final step ensures the cookies set properly and the kisses firm up just enough to hold their shape.
How to Serve Hershey’s Red Velvet Blossoms Cookies Recipe
Garnishes
For an extra festive touch, sprinkle a little extra powdered sugar or mini red and white sprinkles on top after adding the Hershey’s Kiss. It makes each cookie pop visually and adds a fun texture contrast.
Side Dishes
These cookies pair wonderfully with a cold glass of milk, a cozy cup of hot cocoa, or even a creamy vanilla ice cream for a simple dessert duo that feels luxurious and comforting.
Creative Ways to Present
Try arranging the cookies on a holiday-themed platter or nestled in a decorative tin for gift-giving. You could also stack a few with parchment paper in between for an inviting cookie tower that’s perfect for sharing at parties.
Make Ahead and Storage
Storing Leftovers
Store any leftover cookies in an airtight container at room temperature for up to five days. This keeps them soft and tasty, preserving that delightful chewy texture you love.
Freezing
You can freeze the baked cookies, tightly wrapped or in a sealed container, for up to three months. Just thaw them at room temperature before serving to enjoy them fresh.
Reheating
If you want to bring back the freshly baked warmth, pop the cookies in a 300°F oven for a few minutes or microwave briefly. Just be careful not to overheat, or the Hershey’s Kiss might melt too much.
FAQs
Can I use a different type of chocolate instead of Hershey’s Kisses?
Absolutely! While Hershey’s Kisses are classic in this recipe, you can use mini chocolate chips or other bite-sized chocolates. Just ensure they’re small enough to press lightly into the cookie without overwhelming it.
What if I don’t have red food coloring?
You can substitute with natural alternatives like beet juice or powder, but be aware the color may be less vibrant. For the traditional look, stick with red food dye for best results.
How do I prevent the cookies from spreading too much?
Make sure your butter is softened but not melted, and chill the dough if it feels too soft before rolling. Using parchment paper and spacing cookies well apart on the baking sheet also helps keep them from merging.
Can I make these cookies gluten-free?
Yes, by swapping in a gluten-free all-purpose baking flour blend, you can make a version suitable for gluten-sensitive guests. Just double-check your other ingredients to ensure they’re gluten-free as well.
Why are my cookies cakey instead of chewy?
Overmixing the batter or baking for too long can cause cakey cookies. Try mixing until just combined and adjust baking time slightly to keep the centers soft and chewy, the hallmark of Hershey’s Red Velvet Blossoms Cookies Recipe.
Final Thoughts
You can’t go wrong with the Hershey’s Red Velvet Blossoms Cookies Recipe as your next baking adventure. It’s a true crowd-pleaser that brings together easy-to-find ingredients and straightforward steps with stunning results. Trust me, once you try making these cookies, they’ll become a beloved staple in your kitchen for celebrations or cozy moments alike.
Print
Hershey’s Red Velvet Blossoms Cookies Recipe
- Prep Time: 15 minutes
- Cook Time: 12 minutes
- Total Time: 27 minutes
- Yield: 30 cookies
- Category: Dessert
- Method: Baking
- Cuisine: American
- Diet: Vegetarian
Description
Delight in the classic charm of Hershey’s Red Velvet Blossoms Cookies, featuring soft red velvet dough rolled in powdered sugar and topped with a signature Hershey’s Kiss. These festive cookies are perfect for parties and holiday celebrations, delivering a tender texture with a touch of cocoa and the iconic chocolate kiss centerpiece.
Ingredients
Dry Ingredients
- 2 1/4 cups all-purpose flour
- 1 tablespoon cocoa powder
- 1 teaspoon baking soda
- 1/2 teaspoon salt
Wet Ingredients
- 1/2 cup unsalted butter, softened
- 1 cup sugar
- 1 large egg
- 1 tablespoon red food coloring
- 1 teaspoon vanilla extract
Toppings
- 1/2 cup powdered sugar
- 30 Hershey’s Kisses, unwrapped
Instructions
- Preheat the Oven: Preheat your oven to 350°F (175°C) to prepare for baking the cookies.
- Mix the Dry Ingredients: In a bowl, combine the all-purpose flour, cocoa powder, baking soda, and salt. Stir these together and set aside.
- Cream Butter and Sugar: Using a separate bowl, beat the softened unsalted butter and sugar together until the mixture becomes light and fluffy, which helps to incorporate air for a tender cookie.
- Add Egg and Color: Mix in the large egg, red food coloring, and vanilla extract thoroughly until all ingredients are fully blended.
- Combine Mixtures: Gradually add the dry ingredients into the butter mixture, stirring gently until just combined to avoid overmixing which can toughen the cookies.
- Roll the Cookies: Scoop out approximately one tablespoon of dough for each cookie and roll the dough into balls. Then, roll each dough ball in powdered sugar to coat completely.
- Bake the Cookies: Arrange the dough balls spaced on a baking sheet lined with parchment paper and bake in the preheated oven for 10 to 12 minutes until the edges are set but the centers remain soft.
- Add the Kisses: Immediately after removing the cookies from the oven, press one unwrapped Hershey’s Kiss into the center of each warm cookie, allowing the heat to slightly melt the chocolate for adherence.
- Cool: Allow the cookies to cool on the baking sheet for a few minutes, then transfer them to a wire rack to cool completely before serving or storing.
Notes
- For best results, use room temperature butter to ensure proper creaming and texture.
- Do not overbake; cookies should be soft in the center to maintain a tender inside after cooling.
- You can substitute the red food coloring with natural beet juice for a natural dye alternative.
- Store cookies in an airtight container at room temperature for up to 5 days.
- These cookies freeze well; freeze unbaked dough balls rolled in powdered sugar and bake fresh when desired.


