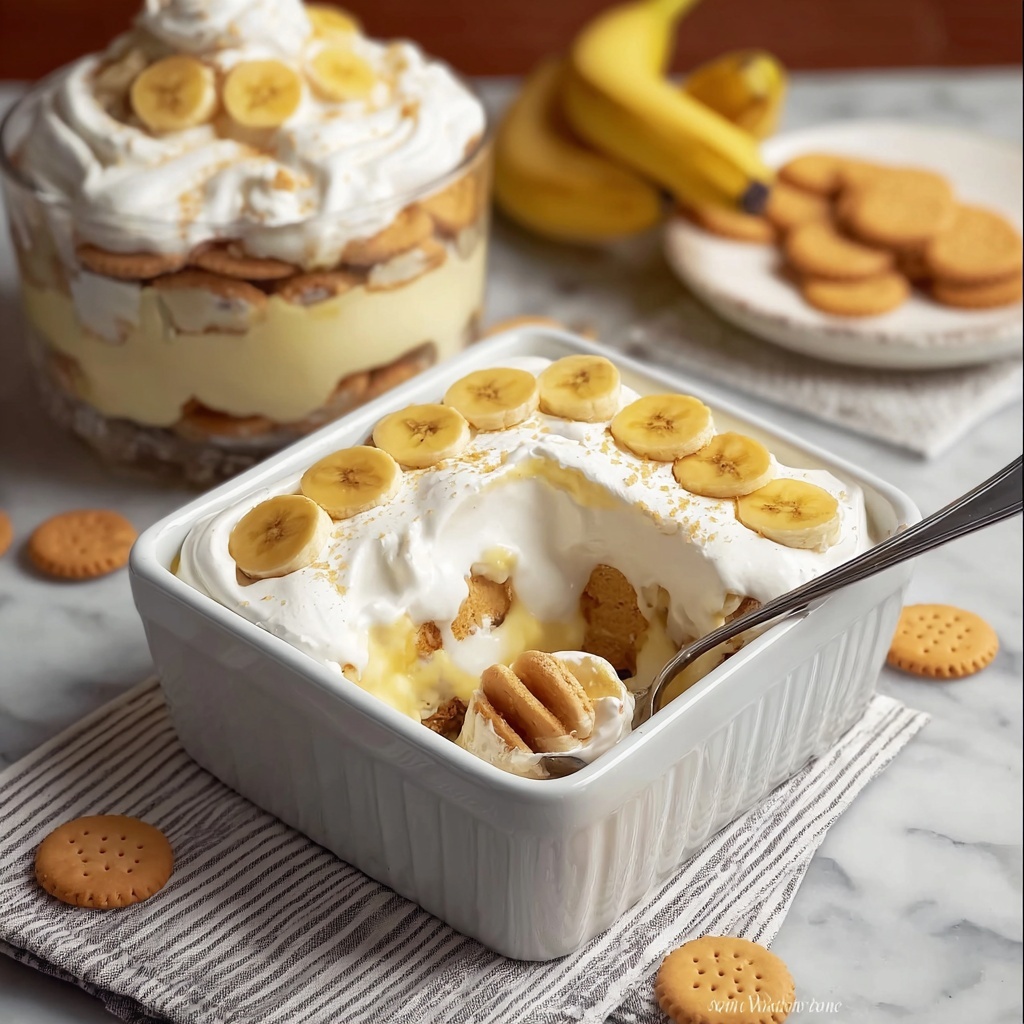
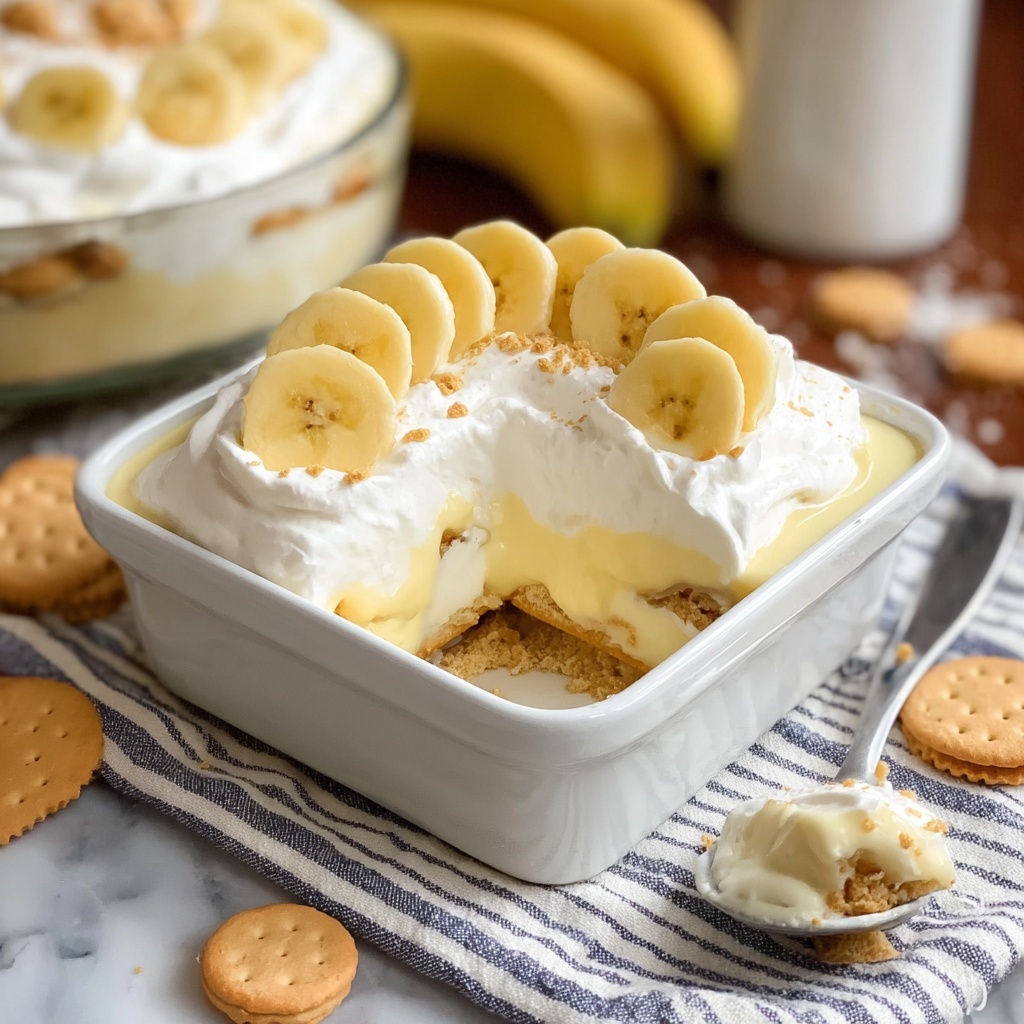
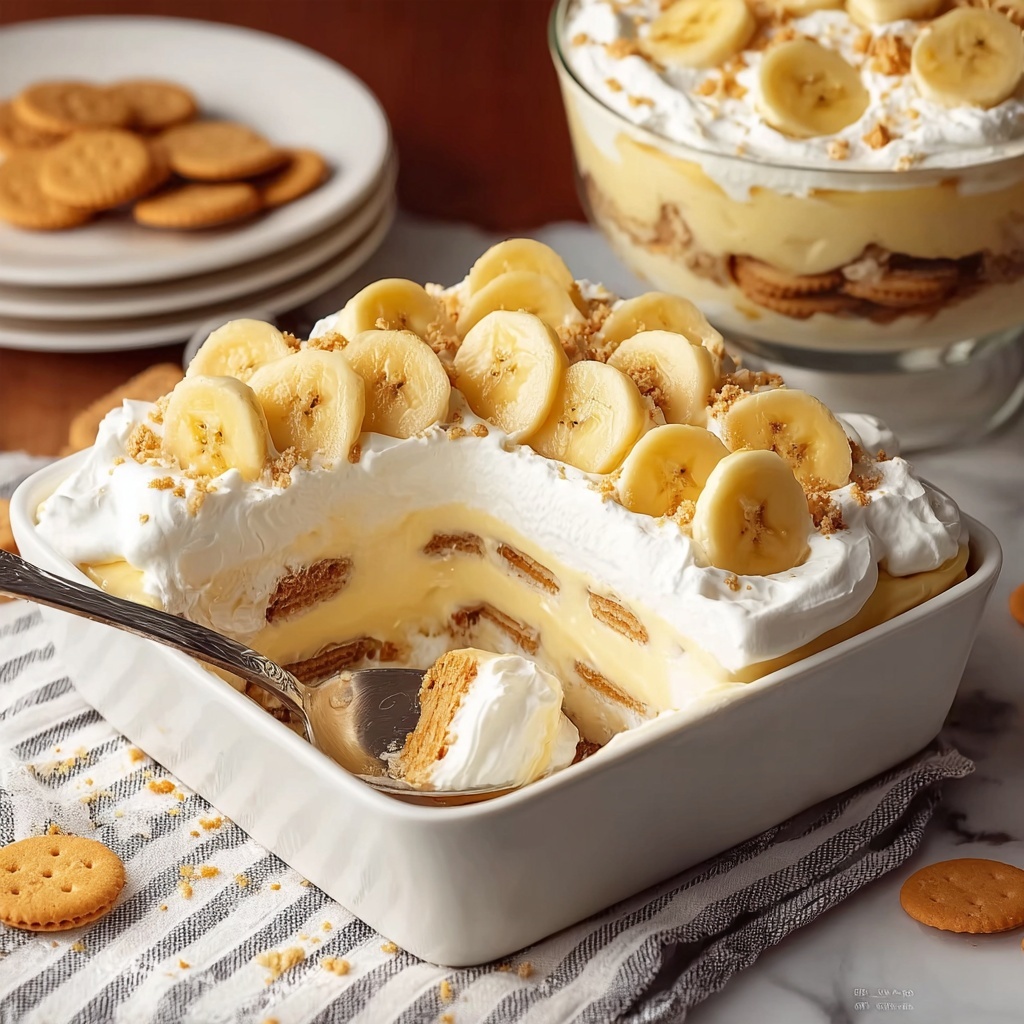
If you’re looking for a dessert that feels like a warm hug in every spoonful, this Banana Pudding Recipe is your new best friend. Creamy, smooth pudding layered with fresh bananas and crisp vanilla wafers creates a perfect balance of textures and flavors that’s downright irresistible. It’s a timeless treat that brings back sweet memories and is always a crowd-pleaser. Whether you’re making it for a family gathering or just because you deserve it, this Banana Pudding Recipe offers comfort and joy in every bite.
Ingredients You’ll Need
This Banana Pudding Recipe relies on simple, wholesome ingredients that come together effortlessly to create a rich and luscious dessert. Each item plays an important role—from the creamy whole milk that builds the pudding base, to the fresh bananas adding natural sweetness and a soft texture, and the vanilla wafers for a subtle crunch that contrasts beautifully with the silky pudding.
- Whole milk: The backbone of the pudding, providing a creamy and smooth texture that’s essential for a rich flavor.
- Granulated sugar: Adds the perfect level of sweetness without overpowering the bananas or vanilla.
- Cornstarch: Acts as a thickening agent, turning the milk mixture into a pudding that holds its shape beautifully.
- Salt: Just a pinch to balance and enhance all the sweet flavors.
- Large egg yolks: Give the pudding that silky richness and help with thickening for a custard-like consistency.
- Pure vanilla extract: Brings depth and warmth, making the pudding irresistibly fragrant.
- Ripe bananas: Naturally sweet and soft, they add freshness and a fruity contrast to the creamy pudding.
- Vanilla wafers: The classic crunchy element that provides texture and a nostalgic touch.
- Whipped cream (optional): A light, airy topping that elevates the dessert with even more creaminess.
How to Make Banana Pudding Recipe
Step 1: Prepare the Pudding Base
Start by combining the granulated sugar, cornstarch, and salt in a medium saucepan. Whisk in the whole milk gradually until the mixture is smooth and lump-free. This base will soon transform into a creamy, dreamy pudding that’s the star of the show.
Step 2: Cook Until Thickened
Place the saucepan over medium heat and stir constantly. You’ll watch the mixture slowly thicken and bubble to a gentle boil after about 6 to 8 minutes—this is where the magic happens as the pudding begins to take shape with a lush, velvety texture.
Step 3: Temper the Egg Yolks
Remove the pot from heat briefly. In a separate small bowl, whisk the egg yolks until smooth. Then, to avoid scrambling, slowly whisk in half a cup of the hot pudding mixture into the yolks. This gentle warming step, known as tempering, readies the eggs for the next cooking stage.
Step 4: Combine and Finish Cooking
Pour the tempered eggs back into the saucepan with the pudding base, whisking continuously. Return the pan to medium-low heat and cook for another 2 to 3 minutes, until the pudding thickens even more to a custard-like consistency. Remove from heat and stir in the fragrant vanilla extract to complete the luscious flavor.
Step 5: Cool the Pudding Slightly
Let the pudding cool for about 10 minutes. This makes it easier to layer without melting the bananas or wafers, helping the dessert hold its beautiful layered structure.
Step 6: Assemble the Layers
In your favorite serving dish or individual glasses, create alternating layers of vanilla wafers, sliced bananas, and pudding. Repeat these layers until all ingredients are used up, making sure to finish with a smooth layer of pudding on top—it looks stunning and keeps everything moist.
Step 7: Chill Thoroughly
Cover the dish with plastic wrap, pressing it gently onto the pudding’s surface to prevent a skin from forming. Refrigerate for at least 3 hours to let all the flavors meld and the wafers soften just enough to blend perfectly with the creamy pudding and fresh bananas.
Step 8: Add the Finishing Touches
When it’s time to serve your Banana Pudding Recipe, top with whipped cream for an extra creamy layer, additional banana slices for freshness, or crumbled vanilla wafers for a fun crunch. These little extras make each bite even more delightful!
How to Serve Banana Pudding Recipe
Garnishes
Topping your Banana Pudding Recipe with freshly whipped cream adds a fluffy contrast to the dense pudding, while a few banana slices on top celebrate the star ingredient. Crumbled vanilla wafers sprinkled over the top bring a lovely crunch and make the presentation irresistible.
Side Dishes
This pudding shines best on its own as a dessert but can be paired beautifully with light options like a crisp green salad or fresh berries if you’re serving it as part of a larger meal. The combination keeps the palate refreshed and ready for each luscious bite of the pudding.
Creative Ways to Present
For a fun twist, serve this Banana Pudding Recipe in individual mason jars or pretty parfait glasses. Layering it this way not only looks charming but also lets everyone enjoy their personal portion. You can also experiment with festively flavored wafers or add a drizzle of caramel sauce for extra indulgence.
Make Ahead and Storage
Storing Leftovers
Leftover banana pudding stores wonderfully in the refrigerator for up to three days. Keep it tightly covered with plastic wrap or an airtight container to preserve freshness and prevent the pudding from absorbing other fridge odors.
Freezing
While this Banana Pudding Recipe tastes best fresh or chilled, you can freeze leftovers if needed. Place portions in freezer-safe containers, but note that the texture of the bananas may change and become softer upon thawing. For best results, thaw in the refrigerator overnight before serving.
Reheating
Since this is a chilled dessert, reheating isn’t typically recommended for Banana Pudding Recipe. However, if you prefer it slightly warmer, allow it to sit at room temperature for 20 minutes or gently warm individual portions for a few seconds in the microwave, keeping a close eye on texture changes.
FAQs
Can I use low-fat milk instead of whole milk?
Absolutely! You can substitute low-fat or even non-dairy milk, but keep in mind the pudding might be less creamy and rich. Whole milk offers the best texture and flavor for this Banana Pudding Recipe.
How ripe should the bananas be?
Look for bananas that are ripe but not overly mushy. They should be yellow with just a few brown spots to provide natural sweetness and hold their shape nicely in the dessert.
Can I prepare this pudding recipe without eggs?
Egg yolks help thicken and enrich the pudding, but you can use egg substitutes or cornstarch-thickened custard alternatives if you prefer an egg-free version. The texture will be slightly different but still delicious.
What can I use instead of vanilla wafers?
If you can’t find vanilla wafers, ladyfingers or graham crackers make great alternatives, adding a slightly different crunch and flavor while maintaining the layered texture this dessert is known for.
How long does the banana pudding need to chill?
For the best flavor and texture, chill the pudding for at least 3 hours. This allows the layers to meld together and the wafers to soften just right, making every spoonful smooth and perfectly balanced.
Final Thoughts
This Banana Pudding Recipe is a true treasure, combining simple ingredients into a dessert that feels special but is never fussy. It’s comfort in a bowl that’s perfect for sharing with friends and family or treating yourself on a sunny afternoon. Give it a try, and you might just find yourself reaching for seconds — or thirds!
Print
Banana Pudding Recipe
- Prep Time: 15 minutes
- Cook Time: 15 minutes
- Total Time: 3 hours 30 minutes
- Yield: 6 servings
- Category: Dessert
- Method: Stovetop
- Cuisine: Southern American
Description
A classic Southern dessert, Banana Pudding features layers of creamy vanilla pudding, ripe banana slices, and crunchy vanilla wafers, chilled to perfection. This luscious pudding combines a smooth custard base made from scratch with simple ingredients and is perfect topped with whipped cream for a delightful treat.
Ingredients
Custard
- 3 cups whole milk
- 3/4 cup granulated sugar
- 1/4 cup cornstarch
- 1/4 teaspoon salt
- 3 large egg yolks
- 2 teaspoons pure vanilla extract
Assembly
- 3 ripe bananas, sliced
- 1 box vanilla wafers (about 50 wafers)
- Whipped cream for topping (optional)
Instructions
- Prepare the custard base: In a medium saucepan, whisk together sugar, cornstarch, and salt until combined. Gradually whisk in the whole milk, making sure the mixture is smooth with no lumps.
- Cook the pudding: Place the saucepan over medium heat and cook the mixture, stirring constantly to prevent sticking or lumps, until it thickens and reaches a gentle boil, about 6 to 8 minutes.
- Temper the eggs: Remove the pan from heat. In a small bowl, whisk the egg yolks. Slowly add about 1/2 cup of the hot pudding mixture to the yolks in a steady stream while whisking continuously to prevent curdling.
- Combine egg mixture and finish cooking: Pour the tempered egg yolks back into the saucepan with the remaining pudding mixture. Cook over medium-low heat, stirring constantly, for another 2 to 3 minutes until the pudding is thickened and creamy. Remove from heat and stir in the pure vanilla extract.
- Cool the pudding: Allow the pudding to cool slightly for about 10 minutes before assembling the dessert to avoid melting the wafers and bananas.
- Assemble the pudding layers: In a serving dish or individual glasses, layer vanilla wafers, sliced bananas, and pudding. Repeat these layers until all ingredients are used, finishing with a layer of pudding on top.
- Chill: Cover the assembled pudding with plastic wrap, pressing it directly onto the surface of the pudding to prevent a skin from forming. Refrigerate for at least 3 hours to allow flavors to meld and the dessert to set properly.
- Serve: Before serving, optionally garnish the pudding with whipped cream, additional banana slices, or crumbled vanilla wafers for extra texture and flavor.
Notes
- Make sure to whisk constantly while cooking the pudding to avoid lumps or burning.
- Tempering the eggs prevents them from scrambling when added to the hot mixture.
- Pressing plastic wrap directly onto the pudding surface prevents a skin from forming during chilling.
- Use ripe but firm bananas to avoid mushiness in the layers.
- This pudding can be prepared a day in advance and kept refrigerated for up to 2 days.


