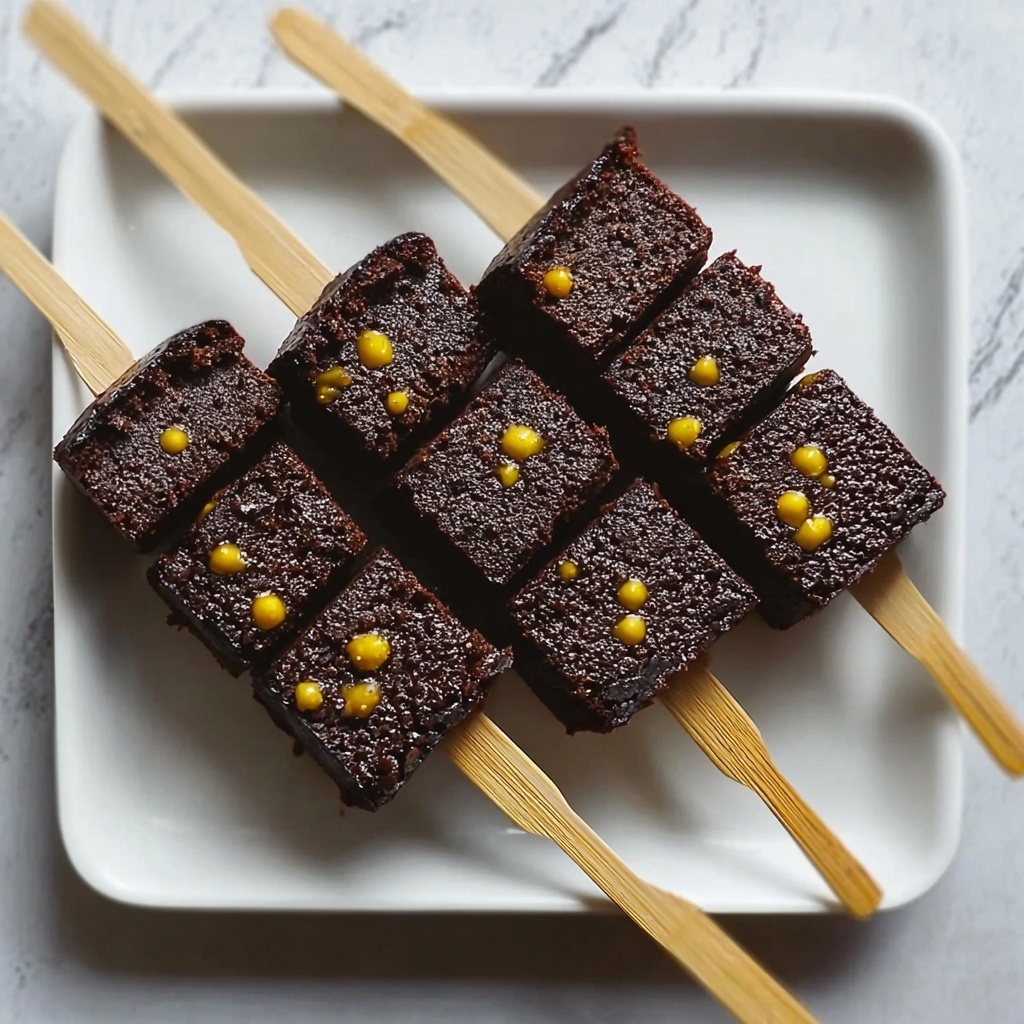
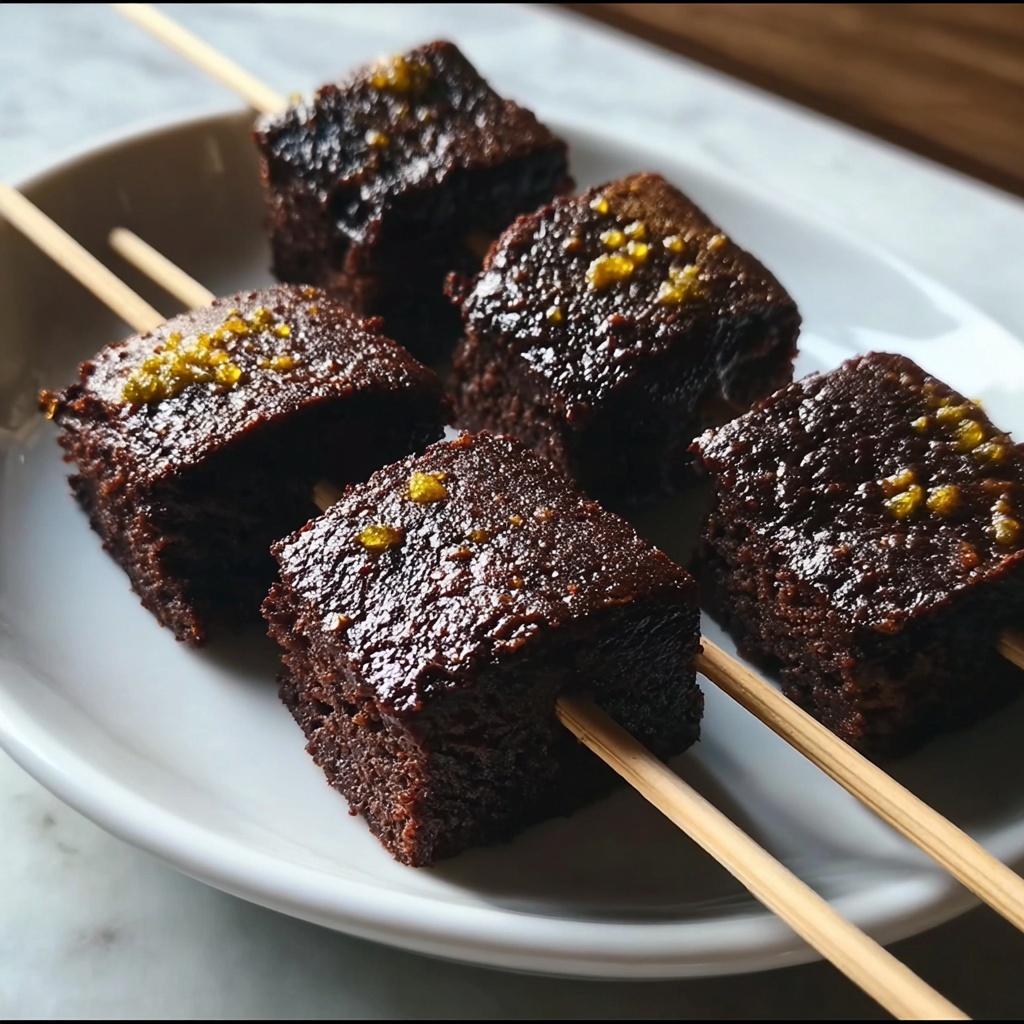
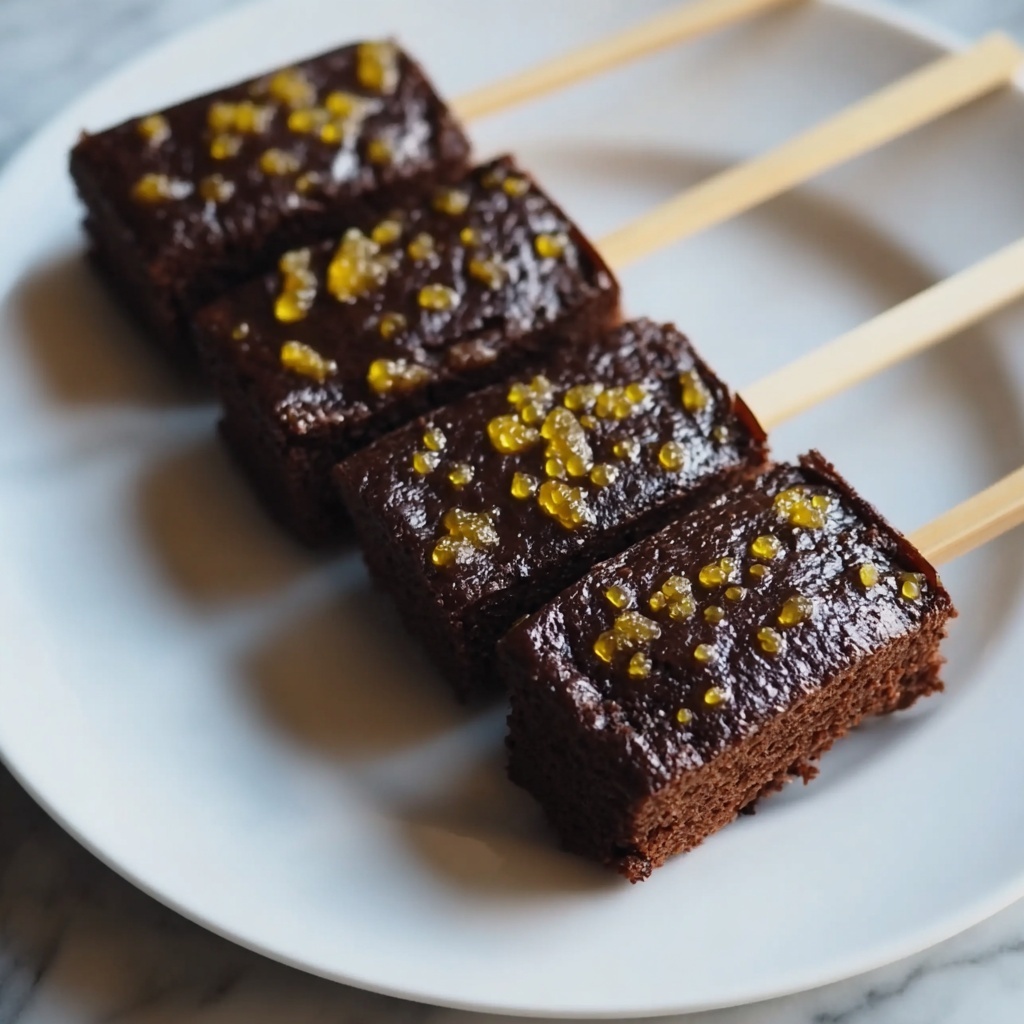
If you love indulgent chocolate treats and enjoy a fun twist on a classic dessert, this Brownies on a Stick Recipe is going to be your new favorite. Imagine rich, fudgy brownies baked to perfection, then dipped in a luscious chocolate coating and decorated with your favorite toppings, all served on a convenient stick. It’s a playful, portable dessert that’s perfect for parties, after-school snacks, or simply whenever a chocolate craving hits. These brownies combine the perfect mix of gooey center and crispy edges with a smooth chocolate dip that’s downright irresistible.
Ingredients You’ll Need
Getting started with this Brownies on a Stick Recipe means gathering a handful of straightforward, everyday ingredients that each play an essential role in creating texture, richness, and that mouthwatering chocolate flavor you crave.
- Brownie mix box: The base of your brownies, providing the chocolate flavor and structure in just a few easy steps.
- Eggs, oil, and water: Key wet ingredients that bring moisture and help the brownies rise properly, as per your brownie mix instructions.
- Semi-sweet chocolate chips (1 cup): For the rich and glossy coating that adds an extra layer of chocolatey goodness.
- Heavy cream (1/4 cup): Mixed with chocolate chips to create a silky dipping sauce that hardens beautifully once cooled.
- Wooden skewers or popsicle sticks (12): To transform your brownies into fun treats on a stick, perfect for dipping and eating.
- Sprinkles, crushed nuts, shredded coconut: Optional toppings that add color, crunch, and extra flavor.
- Extra chocolate chips or crushed candies: Optional garnishes to personalize each brownie and make them visually exciting.
How to Make Brownies on a Stick Recipe
Step 1: Prepare the Brownie Mix
Start by following the instructions on your brownie mix box, usually combining the dry mix with eggs, oil, and water. This simple step is the foundation of your brownies, and getting the batter just right ensures they come out cakey and moist.
Step 2: Bake the Brownies
Pour the prepared batter into a greased baking pan and bake according to your box’s recommendations, generally around 20 to 30 minutes. A toothpick inserted should come out with just a few moist crumbs—not wet batter—to guarantee a perfect bake.
Step 3: Cool the Brownies
Allow the brownies to cool completely before moving on to the next step. This prevents the chocolate coating from melting when you dip them and helps the brownies hold their shape on the stick.
Step 4: Insert the Sticks
Cut the cooled brownies into 12 equal squares and gently insert a wooden skewer or popsicle stick into each piece, pushing it about halfway through to secure.
Step 5: Prepare the Chocolate Coating
Heat the semi-sweet chocolate chips and heavy cream together over low heat or in a microwave, stirring frequently until smooth and silky. This ganache-like coating will be the perfect dip for your brownie pops.
Step 6: Dip the Brownies
Dip each brownie-on-a-stick into the melted chocolate, covering it fully or partially according to your preference. Let the excess drip off before proceeding.
Step 7: Add Toppings
While the chocolate coating is still wet, sprinkle with your favorite toppings like nuts, sprinkles, or shredded coconut. This adds not only delightful texture but also a pretty, colorful finish.
Step 8: Let Set
Place the dipped brownies on a parchment-lined tray and refrigerate for 15 to 20 minutes to allow the chocolate coating to harden completely.
Step 9: Serve and Enjoy
Your delicious Brownies on a Stick Recipe is now ready to dazzle and delight. Serve them at your next gathering or enjoy as a special treat anytime!
How to Serve Brownies on a Stick Recipe
Garnishes
Sprinkles and crushed nuts are classic garnishes that add visual appeal and a delightful crunch, but don’t hesitate to get creative with crushed candy bars, edible glitter, or even a dusting of powdered sugar for that extra wow factor.
Side Dishes
Brownies on a stick pair wonderfully with fresh berries, a scoop of vanilla ice cream, or a drizzle of caramel or raspberry sauce. These accompaniments balance the richness of the chocolate and introduce fresh or creamy contrasts.
Creative Ways to Present
For parties, arrange Brownies on a Stick Recipe on a decorative platter with colorful napkins or stand them upright in a block of floral foam covered in decorative paper for an eye-catching display. You can also wrap individual brownies in cellophane tied with ribbons for gift-giving or party favors.
Make Ahead and Storage
Storing Leftovers
Store leftover brownies in an airtight container at room temperature for up to 3 days. If your kitchen is warm, refrigeration helps maintain the chocolate coating’s firmness and the brownie’s freshness.
Freezing
Wrap brownies individually in plastic wrap and place them in a freezer-safe container or bag. Frozen brownies on a stick keep well for up to 2 months and thaw quickly at room temperature or in the fridge.
Reheating
If desired, warm brownies briefly in the microwave for 10 to 15 seconds to soften the fudge texture without melting the coating completely. Enjoy the richness as if they were freshly baked!
FAQs
Can I use homemade brownie batter instead of boxed mix?
Absolutely! A homemade brownie batter works perfectly in this recipe and can add a personal touch. Just make sure your brownies are firm enough to hold the stick and stand up to dipping.
What if I don’t have heavy cream for the chocolate coating?
You can substitute with milk, but heavy cream makes the chocolate coating smoother and richer. If using milk, the coating might be a bit thinner but will still taste delicious.
How do I keep the brownies from falling off the sticks?
Cooling the brownies fully before inserting the sticks is crucial. Also, pushing the stick about halfway through the brownie square helps secure a firm hold.
Can I use white chocolate instead of semi-sweet chocolate?
Yes! White chocolate or even milk chocolate can be used for the coating to change up the flavor and look. Just adjust the sweetness of your toppings accordingly.
How long will the chocolate coating stay fresh on the brownies?
The chocolate coating stays fresh and crisp at room temperature for about 2 days but lasts longer if stored in the refrigerator, helping preserve that lovely snap.
Final Thoughts
With its playful presentation and decadent flavors, this Brownies on a Stick Recipe is one of those treats that bring joy and smiles no matter the occasion. Whether for a party dessert, a fun gift, or a special everyday indulgence, these little chocolate delights promise happiness in every bite. I can’t wait for you to try making them and see how much fun baking and decorating can be!
Print
Brownies on a Stick Recipe
- Prep Time: 15 minutes
- Cook Time: 25 minutes
- Total Time: 40 minutes
- Yield: 12 servings
- Category: Dessert
- Method: Baking
- Cuisine: American
Description
Brownies on a Stick are a fun and creative twist on classic brownies. These easy-to-make treats are baked brownies served on wooden skewers, dipped in a rich chocolate coating, and customized with a variety of toppings like sprinkles, nuts, and shredded coconut. Perfect for parties, desserts, or anytime you want a handheld chocolatey delight.
Ingredients
Brownie Base
- 1 box of brownie mix (or homemade brownie recipe)
- Ingredients required for the brownie mix (typically 2 eggs, 1/2 cup vegetable oil, and 1/4 cup water; verify on your box)
Chocolate Coating
- 1 cup semi-sweet chocolate chips
- 1/4 cup heavy cream
Toppings (Optional)
- 1/4 cup sprinkles
- 1/4 cup crushed nuts (walnuts or pecans)
- 1/4 cup shredded coconut
- Extra chocolate chips, crushed candies, or other favorite toppings
Assembly
- 12 wooden skewers or popsicle sticks
Instructions
- Prepare the Brownie Mix: Follow the instructions on your brownie mix box by combining the mix with eggs, oil, and water, or prepare your homemade brownie batter as usual.
- Bake the Brownies: Pour the batter into a greased baking pan and bake at the temperature specified on the box (usually 350°F/175°C) for about 20-30 minutes or until a toothpick inserted in the center comes out with a few moist crumbs.
- Cool the Brownies: Allow the brownies to cool completely in the pan to ensure they firm up properly for cutting and handling.
- Insert the Sticks: Cut the cooled brownies into square pieces roughly 2×2 inches in size. Insert one wooden skewer or popsicle stick into each brownie square, pushing through one side halfway through the brownie for stability.
- Prepare the Chocolate Coating: In a microwave-safe bowl, combine the semi-sweet chocolate chips with heavy cream. Heat in 20-second intervals, stirring between each until the mixture is smooth for dipping.
- Dip the Brownies: Dip each brownie on a stick into the melted chocolate coating, ensuring it is fully or partially covered depending on preference.
- Add Toppings: Immediately sprinkle your choice of toppings such as sprinkles, crushed nuts, shredded coconut, or additional chocolate chips on the wet chocolate coating before it sets.
- Let Set: Place the dipped brownies on a parchment-lined tray and let the chocolate coating set at room temperature or chill briefly in the refrigerator until firm.
- Serve and Enjoy: Once set, serve the brownies on sticks as an easy, fun dessert or party treat.
Notes
- Ensure brownies are completely cooled before inserting sticks to prevent them from breaking.
- You can customize the chocolate coating by using white or dark chocolate chips instead of semi-sweet.
- Use a toothpick or small skewer first to make a pilot hole if inserting sticks through delicate brownies.
- For gluten-free options, use a certified gluten-free brownie mix or recipe.
- Store brownies on sticks in an airtight container at room temperature for up to 3 days, or refrigerate for longer freshness.


