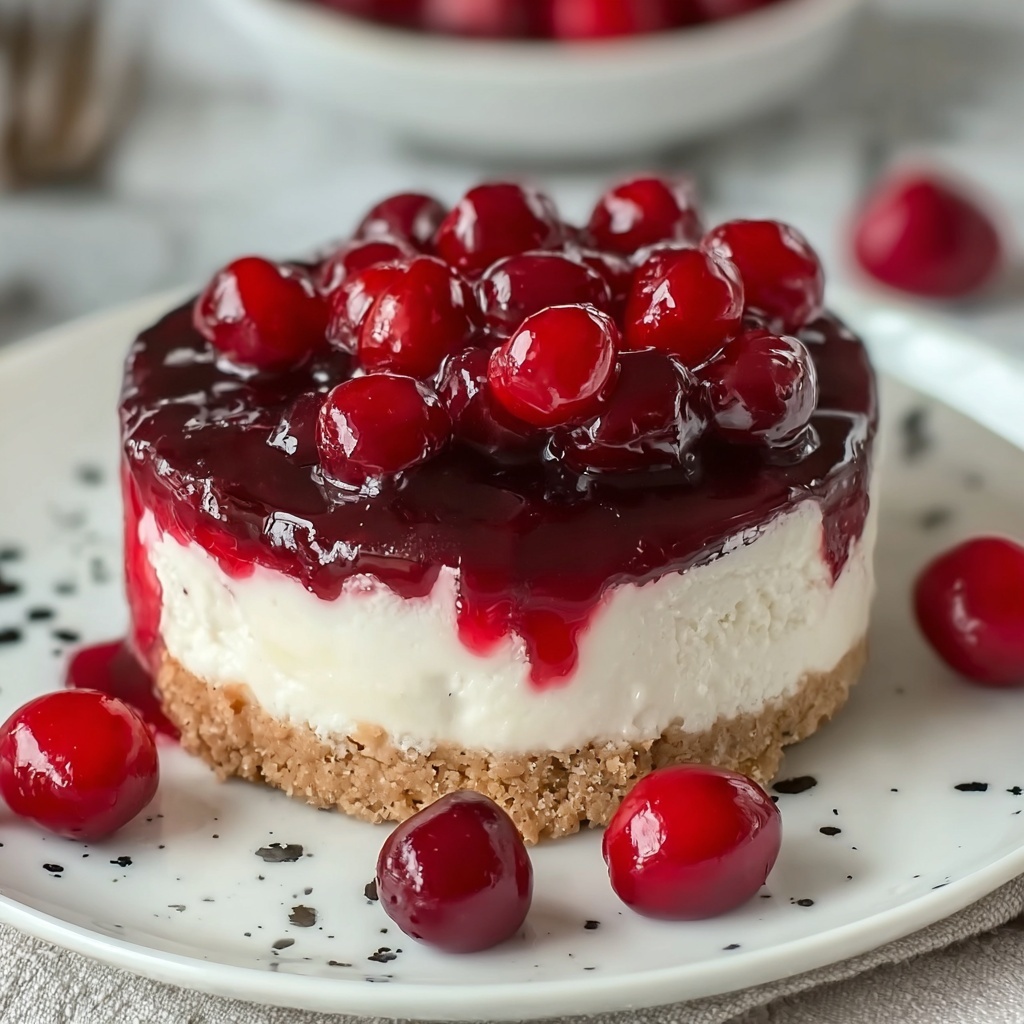
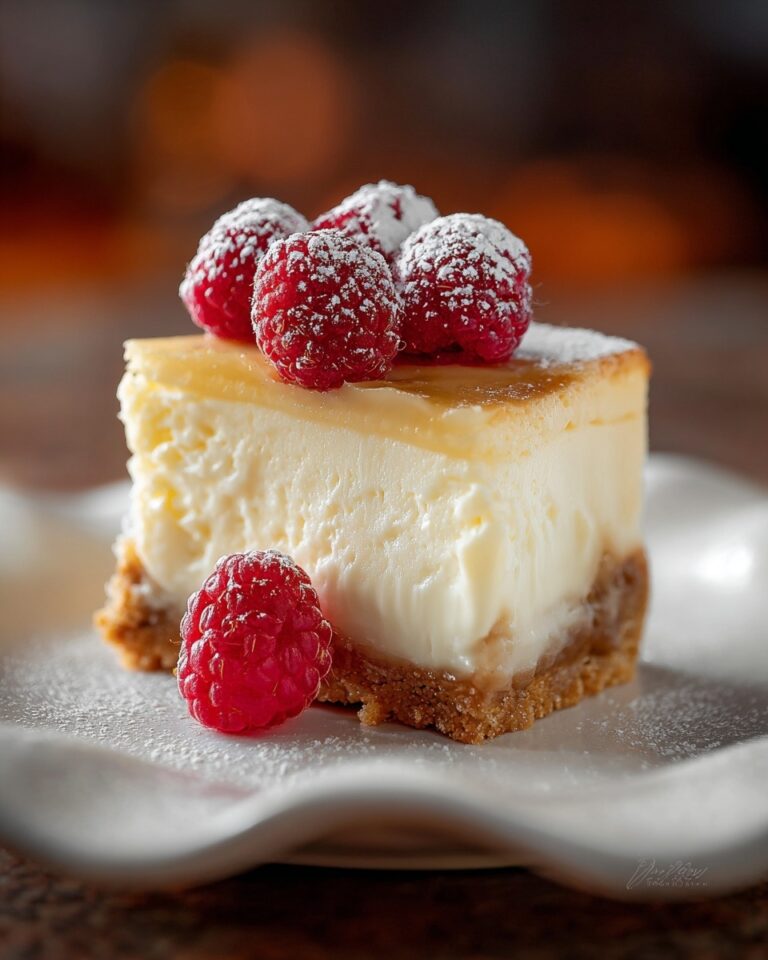
If you’re looking for a dessert that feels like a little celebration in every bite without turning on the oven, then you are absolutely going to adore the Easiest No-Bake Cherry Cheesecake: A Delightful Treat Recipe. This luscious cheesecake brings together a buttery graham cracker crust, a silky smooth cream cheese filling, and the bright, sweet bursts of cherries on top. It’s refreshingly simple yet impressively elegant, making it the perfect treat for any occasion when you want to impress without the stress.
Ingredients You’ll Need
Getting started with this cheesecake means gathering a handful of simple, wholesome ingredients that each add their part to the magic. From the crunchy crust to the fluffy, rich filling and the vibrant cherry topping, every element counts toward flavor, texture, and that beautiful balance of sweetness.
- Graham cracker crumbs (1 ½ cups): This forms the crunchy, buttery base that holds everything together perfectly.
- Unsalted butter (½ cup, melted): Adds richness to the crust and helps the crumbs stick so your base stays intact.
- Sugar (¼ cup): Sweetens the crust just enough to complement the tangy filling.
- Cream cheese (16 oz, softened): The star of the show, this makes the filling delightfully creamy and smooth.
- Powdered sugar (1 cup): Sweetens the cheesecake filling without any grit, maintaining a silky texture.
- Vanilla extract (1 teaspoon): Infuses the filling with a subtle, warm aroma that lifts all the flavors.
- Heavy whipping cream (1 cup): Whipped into fluffy peaks, it lightens the filling for that melt-in-your-mouth feel.
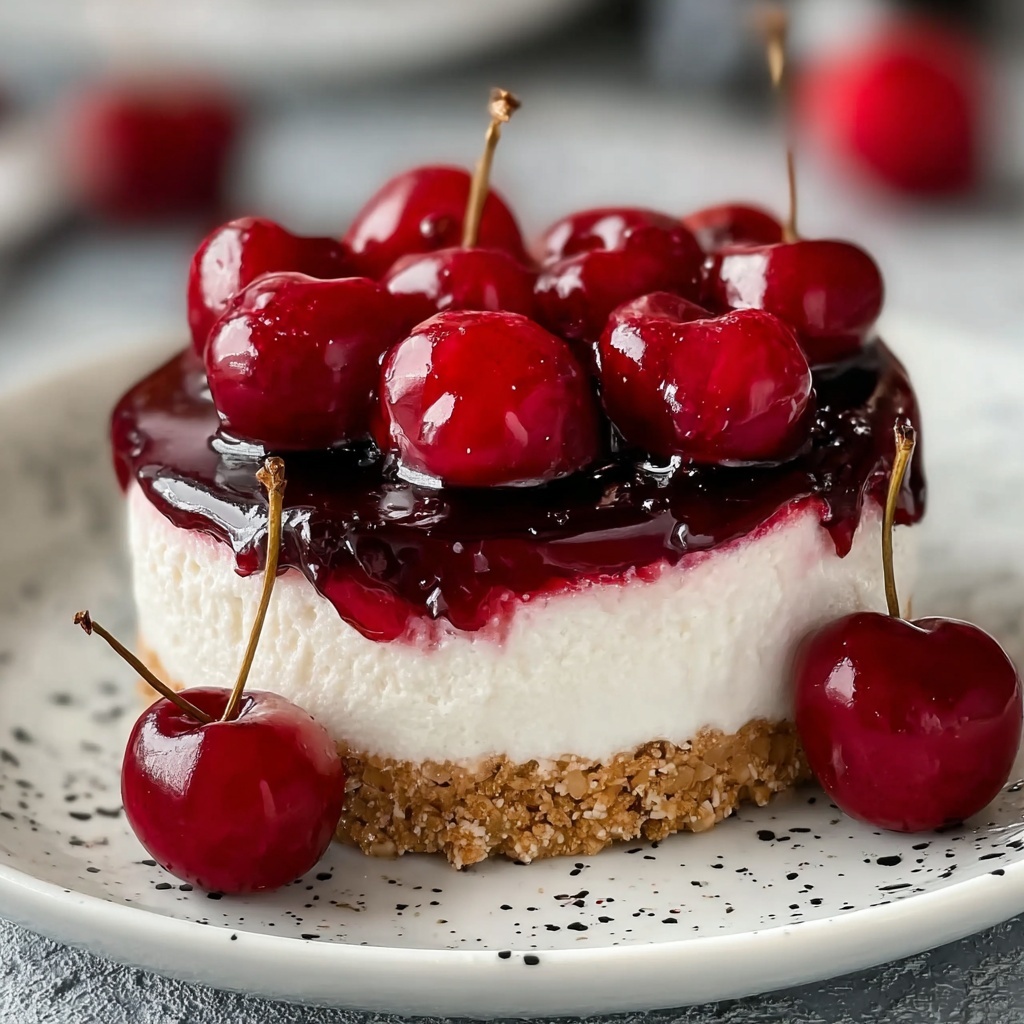
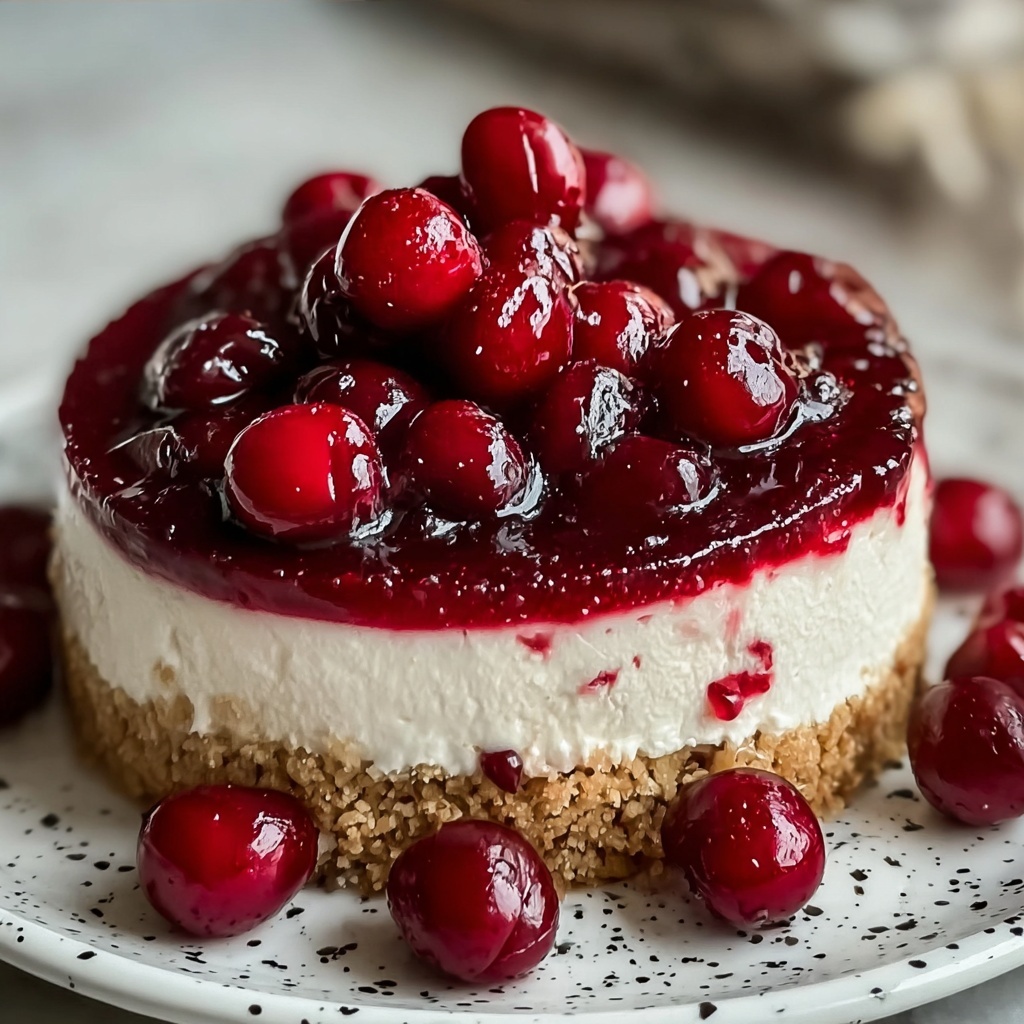
- Cherry pie filling (1 can, 21 oz) or fresh cherries: The jewel on top, adding that gorgeous pop of color and sweet tartness.
How to Make Easiest No-Bake Cherry Cheesecake: A Delightful Treat Recipe
Step 1: Prepare the Crust
Start by combining graham cracker crumbs, melted butter, and sugar in a bowl. Mix until every crumb is coated and clumps together nicely. Press this mixture firmly into the bottom of a 9-inch springform pan. Using the back of a measuring cup to press down ensures your crust is evenly packed and will hold up when sliced. Place it in the fridge to chill while you prepare the filling — this little rest helps it set and keeps the texture perfect.
Step 2: Whip Up the Filling
In a large bowl, beat softened cream cheese using an electric mixer until it’s perfectly smooth and free of lumps. Add powdered sugar and vanilla extract gradually, mixing after each addition until you have a luscious, creamy base. In a separate bowl, whip your heavy cream until stiff peaks form — this means the cream should hold its shape when the whisk is lifted. Gently fold the whipped cream into the cream cheese blend, combining them carefully to keep the airy texture intact. This step ensures your cheesecake filling is delightfully fluffy and not overly dense.
Step 3: Assemble and Chill
Pour your heavenly cream cheese filling over the chilled crust and smooth the top with a spatula. Then, pop the entire cheesecake into the refrigerator for a minimum of 4 hours. Patience here pays off because this chilling time lets the cheesecake firm up beautifully. If you can wait overnight, even better — the flavors meld together to create something truly memorable.
Step 4: Add the Cherry Topping
Once your cheesecake is set, open up that can of cherry pie filling or use fresh cherries if you prefer a vibrant, natural touch. Spread the cherries evenly over the top, both for eye-catching appeal and that sweet, juicy burst with every bite. The bright red color is as inviting as the taste itself.
Step 5: Slice and Serve
Carefully remove the sides of the springform pan and slice your cheesecake into generous pieces. Each slice reveals the creamy filling against the crunchy crust and glossy cherry topping. Now, dig in and savor the joy of making and enjoying the Easiest No-Bake Cherry Cheesecake: A Delightful Treat Recipe with friends and family.
How to Serve Easiest No-Bake Cherry Cheesecake: A Delightful Treat Recipe
Garnishes
While the cherry topping is a showstopper on its own, you can dress up your cheesecake with a few garnishes for extra flair. A few fresh mint leaves add a pop of green and a refreshing contrast, or a light dusting of powdered sugar can create a delicate snowy effect. For an indulgent touch, consider drizzling some chocolate or caramel sauce, which pairs beautifully with cherries.
Side Dishes
This cheesecake shines as a dessert star, but pairing it with a lightly brewed cup of coffee or herbal tea can balance its richness wonderfully. Fresh fruit salad or a scoop of vanilla ice cream on the side adds even more fun and complements the creamy texture. For a party, a small cheese and charcuterie board alongside works surprisingly well, mixing sweet and savory notes.
Creative Ways to Present
Looking to impress guests or add some whimsy? Serve individual servings in clear glasses layered with crust and filling, topped with cherries and a sprig of fresh thyme. Alternatively, use mini mason jars for portable, cute dessert cups. You could even swirl some crushed cherry candies into the filling for an unexpected crunch. These little creativity touches make the Easiest No-Bake Cherry Cheesecake: A Delightful Treat Recipe even more special.
Make Ahead and Storage
Storing Leftovers
This cheesecake keeps beautifully in the fridge for up to 4 days when covered tightly with plastic wrap or stored in an airtight container. The flavors actually deepen after sitting a bit, so leftovers are almost as delicious as fresh slices. Just remember to keep it chilled to maintain that perfect creamy consistency.
Freezing
If you want to prepare ahead for a big event, the cheesecake freezes wonderfully. Wrap it securely with plastic wrap and then foil to protect it from freezer burn. Freeze for up to 2 months. When you’re ready to indulge, thaw it overnight in the fridge for the best texture. This makes the Easiest No-Bake Cherry Cheesecake: A Delightful Treat Recipe perfect for planning ahead without stress.
Reheating
No need to reheat this dessert; it’s best served chilled. However, just take it out of the fridge about 10 minutes before serving to let those flavors come alive fully. Warming it would alter the texture and soften the crust, so resist the urge and enjoy it cold for the ultimate creamy delight.
FAQs
Can I use fresh cherries instead of canned pie filling?
Absolutely! Fresh cherries bring a natural sweetness and a little extra texture. You can cook them down slightly with a bit of sugar to mimic the pie filling consistency or just use them fresh on top for a brighter, less sweet taste.
Do I need a springform pan for this recipe?
While a 9-inch springform pan is recommended for easy removal and clean edges, you can also use a regular 9-inch cake pan lined with parchment paper for easier lifting. Just be gentle when removing the cheesecake to keep the slices intact.
Can I substitute the cream cheese with a lighter option?
You could try using a lighter cream cheese or even mascarpone, but keep in mind this will slightly change the texture and flavor. Full-fat cream cheese really gives that rich, creamy result that makes this the Easiest No-Bake Cherry Cheesecake: A Delightful Treat Recipe so satisfying.
Is it possible to make this vegan or dairy-free?
Yes! Use plant-based cream cheese alternatives and coconut cream whipped to stiff peaks instead of heavy cream. Just note the flavor will be a bit different, but still delicious and suitable for dairy-free diets.
How long does the cheesecake need to chill?
At least 4 hours is required to set the cheesecake properly, but chilling it overnight will give you the best texture and depth of flavor, making every bite a little more perfect.
Final Thoughts
If you want to experience a dessert that pairs ease and elegance in every slice, the Easiest No-Bake Cherry Cheesecake: A Delightful Treat Recipe is your new best friend. It’s wonderfully simple to make, rich and creamy in taste, and topped with a vibrant cherry burst that feels like a hug on a plate. I absolutely encourage you to give it a try — once you’ve had this no-fuss, no-oven wonder, you’ll find yourself reaching for it again and again for celebrations big and small.
Print
Easiest No-Bake Cherry Cheesecake: A Delightful Treat Recipe
- Prep Time: 20 minutes
- Cook Time: 0 minutes
- Total Time: 4 hours 20 minutes (mostly chilling time)
- Yield: 10 servings
- Category: Dessert
- Method: No-Cook
- Cuisine: American
Description
This Easiest No-Bake Cherry Cheesecake is a smooth and creamy dessert featuring a buttery graham cracker crust and a luscious cream cheese filling topped with sweet cherry pie filling. Perfect for those who want a delicious treat without baking, this cheesecake requires minimal prep and a few hours of refrigeration for the ideal set.
Ingredients
Crust
- 1 ½ cups graham cracker crumbs
- ½ cup unsalted butter, melted
- ¼ cup sugar
Filling
- 16 oz (2 packages) cream cheese, softened
- 1 cup powdered sugar
- 1 teaspoon vanilla extract
- 1 cup heavy whipping cream
Topping
- 1 can (21 oz) cherry pie filling (or fresh cherries if preferred)
Instructions
- Prepare the crust: In a bowl, mix graham cracker crumbs, melted butter, and sugar until well combined. Press the mixture into the bottom of a 9-inch springform pan, using the back of a measuring cup to pack it tightly. Refrigerate while preparing the filling.
- Make the filling: In a large bowl, beat the softened cream cheese with an electric mixer until smooth. Gradually add powdered sugar and vanilla extract, mixing until fully incorporated. In another bowl, whip the heavy cream until stiff peaks form. Gently fold the whipped cream into the cream cheese mixture until combined.
- Assemble and chill: Pour the cream cheese filling over the chilled crust and spread evenly. Refrigerate for at least 4 hours, or until set (overnight is best if you can wait!).
- Add the cherry topping: Before serving, spread the cherry pie filling over the cheesecake evenly.
- Serve: Slice and enjoy your delicious no-bake cherry cheesecake!
Notes
- Use a springform pan for easy removal of the cheesecake.
- The cheesecake should be chilled for at least 4 hours, but overnight chilling enhances flavor and texture.
- If you prefer fresh cherries, you can substitute the pie filling with fresh or macerated cherries.
- For a firmer crust, you can bake the crust for 5 minutes at 350°F before chilling, though this is optional.
