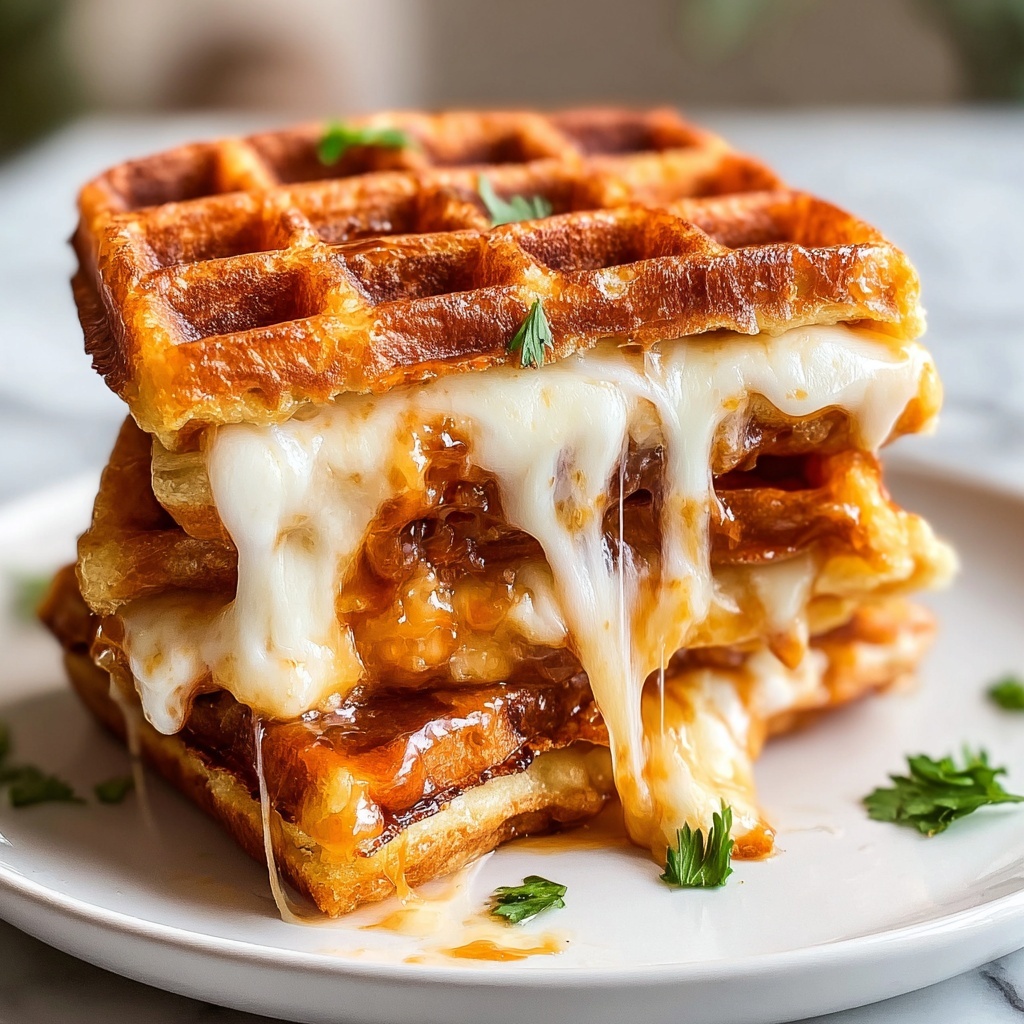
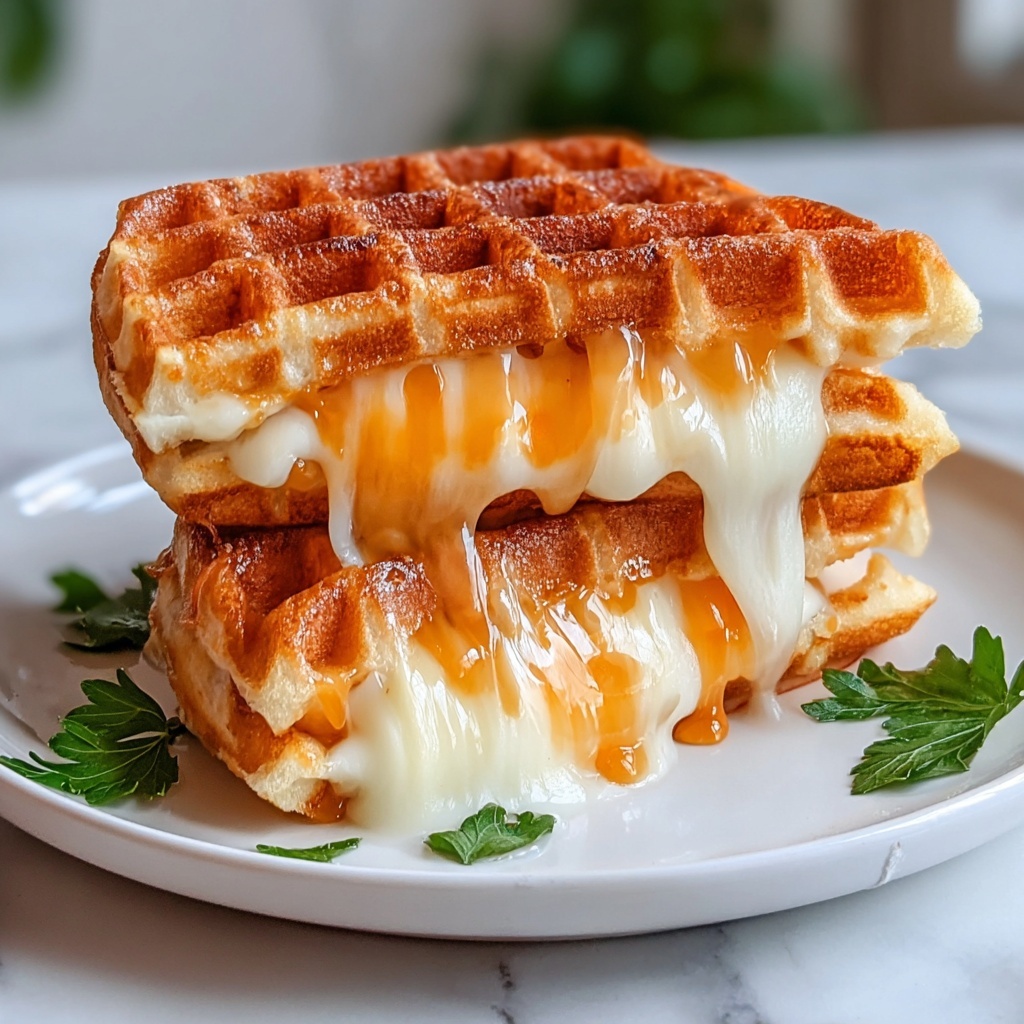
If you’re looking for a fun and delicious twist on the classic comfort food, this Grilled Cheese Chaffles Recipe is your soon-to-be favorite go-to. Combining the crispiness of waffles with the melty, cheesy goodness of grilled cheese, these chaffles are simple to whip up yet packed with flavor and texture that will impress everyone at the table. Whether you’re on a low-carb journey or just craving something warm and satisfying, this recipe brings all the best bits of grilled cheese sandwiches into a perfectly golden waffle form.

Ingredients You’ll Need
Keeping things straightforward yet flavorful, the ingredients for this recipe work together beautifully to create that signature crispy exterior and cheesy, fluffy interior. Each element plays an important role, from the eggs providing structure to the cheese delivering the rich flavor that makes this dish irresistible.
- 2 large eggs: Eggs act as the binding agent and help create that waffle texture essential to chaffles.
- 1 cup shredded cheese (cheddar or mozzarella): Cheese is the heart of this recipe, offering gooeyness and sharp flavor; cheddar gives a bold taste while mozzarella melts smoothly.
- 1/2 cup almond flour: This low-carb flour adds a subtle nuttiness and the perfect density to hold the chaffle together without heaviness.
- 1 tsp baking powder: A little lift comes from baking powder, helping your chaffles to be light and airy inside.
- 1/4 tsp salt: Enhances all the other savory flavors and balances the cheese.
- Non-stick cooking spray: Ensures your chaffles don’t stick to the waffle maker and achieve that golden crust effortlessly.
How to Make Grilled Cheese Chaffles Recipe
Step 1: Preheat and Prepare
Start by preheating your waffle maker and giving it a quick spray with non-stick cooking spray. This step is crucial for getting a perfect, golden crust without any sticking, making your chaffles come out clean and crispy every time.
Step 2: Mix the Batter
In a mixing bowl, whisk together the eggs, shredded cheese, almond flour, baking powder, and salt until everything is well combined. The mixture should be slightly thick but pourable, bursting with cheesy goodness ready to turn into golden chaffles.
Step 3: Cook Your Chaffles
Pour half the batter into the preheated waffle maker, spreading it evenly to fill the grids. Close the lid and let it cook for about 3 to 5 minutes. You’ll know they’re done when they turn a beautiful golden brown and get crispy on the outside.
Step 4: Remove and Repeat
Carefully lift out your freshly cooked chaffle and set it aside. Don’t forget to re-spray the waffle maker before pouring in the remaining batter to keep everything non-stick and smooth for the next round.
Step 5: Optional Extra Cheese Layer
For those who love an extra cheesy experience, try layering more cheese or your favorite toppings between two chaffles before giving them a quick press back in the waffle maker. It’s an amazing way to up the indulgence and make the recipe your own.
How to Serve Grilled Cheese Chaffles Recipe
Garnishes
Adding a garnish can brighten up these cheesy delights. Fresh herbs like chives or parsley bring a pop of color and a subtle freshness that pairs perfectly with the rich cheese. A dusting of crushed red pepper flakes gives a little heat, creating a lovely contrast to the creamy interior.
Side Dishes
Grilled Cheese Chaffles shine alongside classic comfort sides like a bowl of tomato soup or a crisp green salad with a tangy vinaigrette. For a heartier meal, roasted veggies or crispy bacon make excellent companions, turning this simple recipe into a satisfying feast.
Creative Ways to Present
Why not turn your chaffles into a slider stack? Layer them with slices of ripe tomato, crispy bacon, or even a fried egg for a brunch-worthy treat. Alternatively, cut them into sticks and serve with a selection of dips such as marinara, ranch, or spicy mustard for a fun appetizer twist.
Make Ahead and Storage
Storing Leftovers
If you find yourself with leftovers, don’t worry—Grilled Cheese Chaffles keep well in an airtight container in the refrigerator for up to 3 days. Storing them properly ensures they retain their texture and flavor, ready to enjoy when hunger strikes again.
Freezing
For longer storage, freeze chaffles individually on a baking sheet until solid, then transfer them to a freezer-safe bag. This prevents them from sticking together and keeps them fresh for up to a month, perfect for quick breakfasts or snacks on demand.
Reheating
To bring your chaffles back to life, use a toaster or air fryer to reheat. This method revives their crispiness without drying them out, unlike microwaving which can sometimes make them soggy. Reheated chaffles taste almost as amazing as freshly made!
FAQs
Can I use a different type of cheese in this recipe?
Absolutely! While cheddar and mozzarella are great choices, feel free to experiment with gouda, pepper jack, or even a blend for unique flavors. Just make sure the cheese melts well for the best texture.
Is almond flour necessary or can I substitute it?
Almond flour gives a nice density and subtle flavor, but if you’re not avoiding gluten, you can try coconut flour or even all-purpose flour. Keep in mind different flours absorb moisture differently, so you may need to adjust the quantity slightly.
Can this recipe be made dairy-free?
If you want to go dairy-free, try using a dairy-free cheese alternative that melts well. The texture might change a bit, but you can still achieve delicious results with the right products.
How do I know when my chaffles are done?
Look for a golden brown color and a crisp exterior. Depending on your waffle maker, this usually takes between 3 to 5 minutes. The chaffles should lift easily without sticking once they’re fully cooked.
Can I add other flavors or seasonings to the batter?
Definitely! Adding garlic powder, smoked paprika, or fresh herbs can give your chaffles a delightful extra flavor dimension. Experimenting with seasonings is a fun way to customize this already versatile recipe.
Final Thoughts
I truly hope you give this Grilled Cheese Chaffles Recipe a try soon because it’s such a delightful, cozy dish that’s both easy and fun to make. Whether you’re serving it up for breakfast, lunch, or a casual snack, it’s guaranteed to bring a smile to your face and warm your heart with every cheesy bite. Go ahead and make it your own by adding favorite toppings or seasonings—you’ll love how versatile and delicious these chaffles can be!
Print
Grilled Cheese Chaffles Recipe
- Prep Time: 5 minutes
- Cook Time: 15 minutes
- Total Time: 20 minutes
- Yield: 2 servings (2 chaffles)
- Category: Snack
- Method: Baking
- Cuisine: American
- Diet: Gluten Free
Description
A quick and delicious low-carb grilled cheese alternative called chaffles, made with eggs, cheese, and almond flour, cooked in a waffle maker to achieve a crispy golden texture perfect for sandwiches or snacks.
Ingredients
Main Ingredients
- 2 large eggs
- 1 cup shredded cheese (cheddar or mozzarella)
- 1/2 cup almond flour
- 1 tsp baking powder
- 1/4 tsp salt
- Non-stick cooking spray
Instructions
- Preheat and Prepare: Preheat your waffle maker and spray it with non-stick cooking spray to prevent sticking.
- Mix Ingredients: In a mixing bowl, whisk together the eggs, shredded cheese, almond flour, baking powder, and salt until the batter is smooth and well combined.
- Cook First Chaffle: Pour half of the batter into the preheated waffle maker and spread it evenly for uniform cooking.
- Close and Cook: Close the waffle maker lid and cook for 3 to 5 minutes until the chaffle turns golden brown and crispy.
- Remove and Repeat: Carefully remove the cooked chaffle and repeat the process with the remaining batter, reapplying non-stick spray as needed.
- Optional Extras: For an extra cheesy experience, you can add more cheese or other toppings between layers before cooking to customize your chaffles.
Notes
- Use cheddar for a sharper flavor or mozzarella for a milder taste and stretchier texture.
- Ensure the waffle maker is hot before adding batter for the best crispiness.
- Almond flour keeps the chaffle low-carb and gluten-free.
- Watch closely near the end of cooking to avoid burning.
- Chaffles can be stored in the fridge and reheated in the toaster or oven for convenience.

