
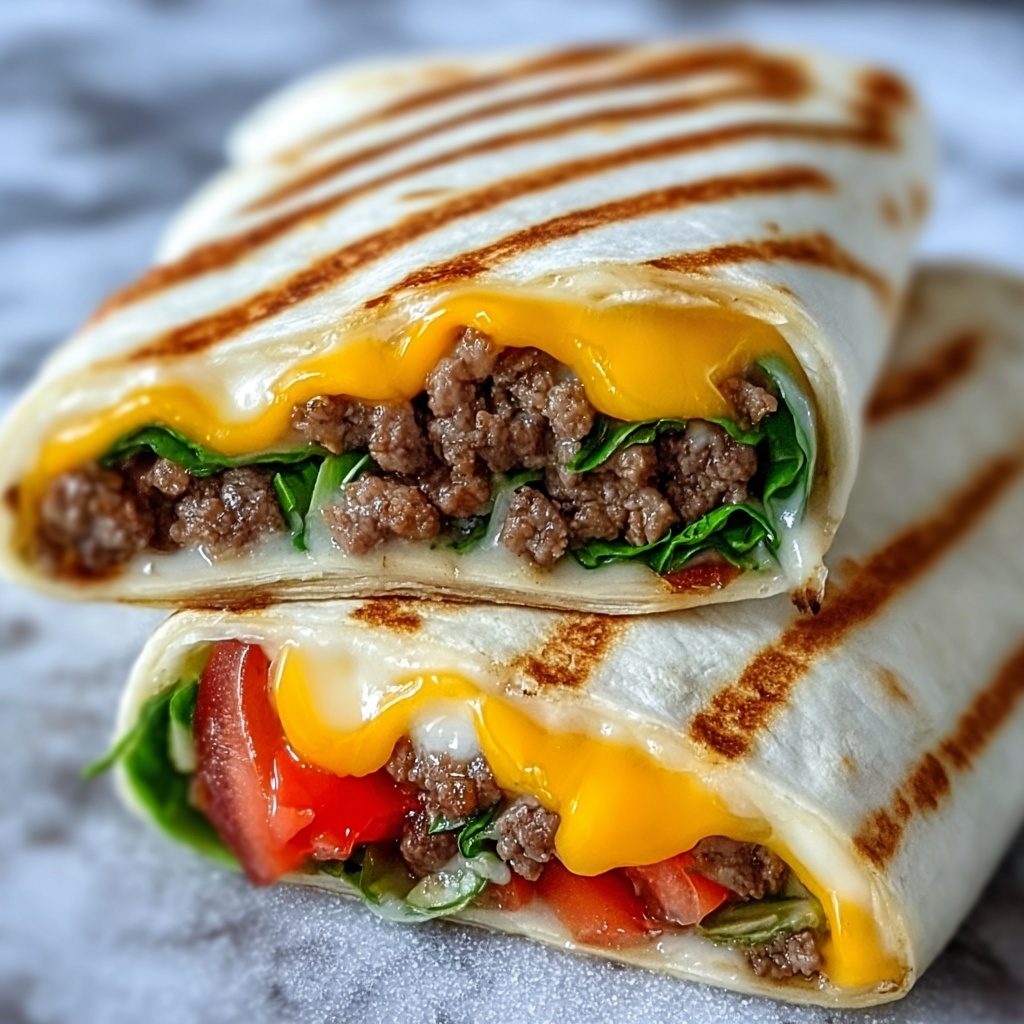
If you love the comforting flavors of a juicy cheeseburger but want to shake things up a bit, these Grilled Cheeseburger Wraps: A Fun Twist on a Classic Recipe are exactly what you need. Imagine all the savory goodness of a cheeseburger wrapped snugly in a warm, crispy tortilla that’s grilled to golden perfection. Each bite delivers a melty, meaty experience with the freshness of classic toppings tucked inside. This recipe is not only quick and easy but also a delightful way to bring some excitement to your mealtime without sacrificing the familiar comfort of a cheeseburger.
Ingredients You’ll Need
Gathering a handful of simple ingredients is all it takes to whip up these irresistible wraps. Each one plays an essential role in building layers of flavor and texture that make this dish so satisfying, from juicy beef to melty cheddar and fresh veggies.
- 1 lb ground beef (or ground turkey): The juicy, savory heart of your wrap providing rich flavor and satisfying protein.
- 1 small onion, finely chopped: Adds a mild sweetness and tender texture when cooked with the beef.
- 1 tablespoon Worcestershire sauce: Brings a subtle tangy depth that amplifies the savory notes.
- 1 teaspoon garlic powder: For a hint of warm, aromatic flavor without overpowering the beef.
- Salt and pepper, to taste: Essential for seasoning, these simple staples balance all the flavors perfectly.
- 1 cup shredded cheddar cheese (or your favorite cheese): Melts beautifully to create that gooey, irresistible cheeseburger element.
- 4 large flour tortillas: Soft, flexible wraps that crisp nicely when grilled and hold all the fillings together.
- Optional toppings: Sliced pickles, lettuce, tomato, ketchup, mustard, mayo, and more for customizable freshness and zing.
- 1 tablespoon butter or olive oil, for grilling: Helps achieve that golden, crispy outside that’s downright addictive.
How to Make Grilled Cheeseburger Wraps: A Fun Twist on a Classic Recipe
Step 1: Cook the Beef
Start by heating a skillet over medium heat and cook your ground beef until beautifully browned. Drain any excess fat to keep things from getting greasy. Then, add your finely chopped onion alongside Worcestershire sauce, garlic powder, salt, and pepper. Keep cooking until the onions soften and the beef is cooked through, which should take about 5 minutes. This savory, well-seasoned meat mixture is truly the flavor foundation that makes these wraps stand out.
Step 2: Assemble the Wraps
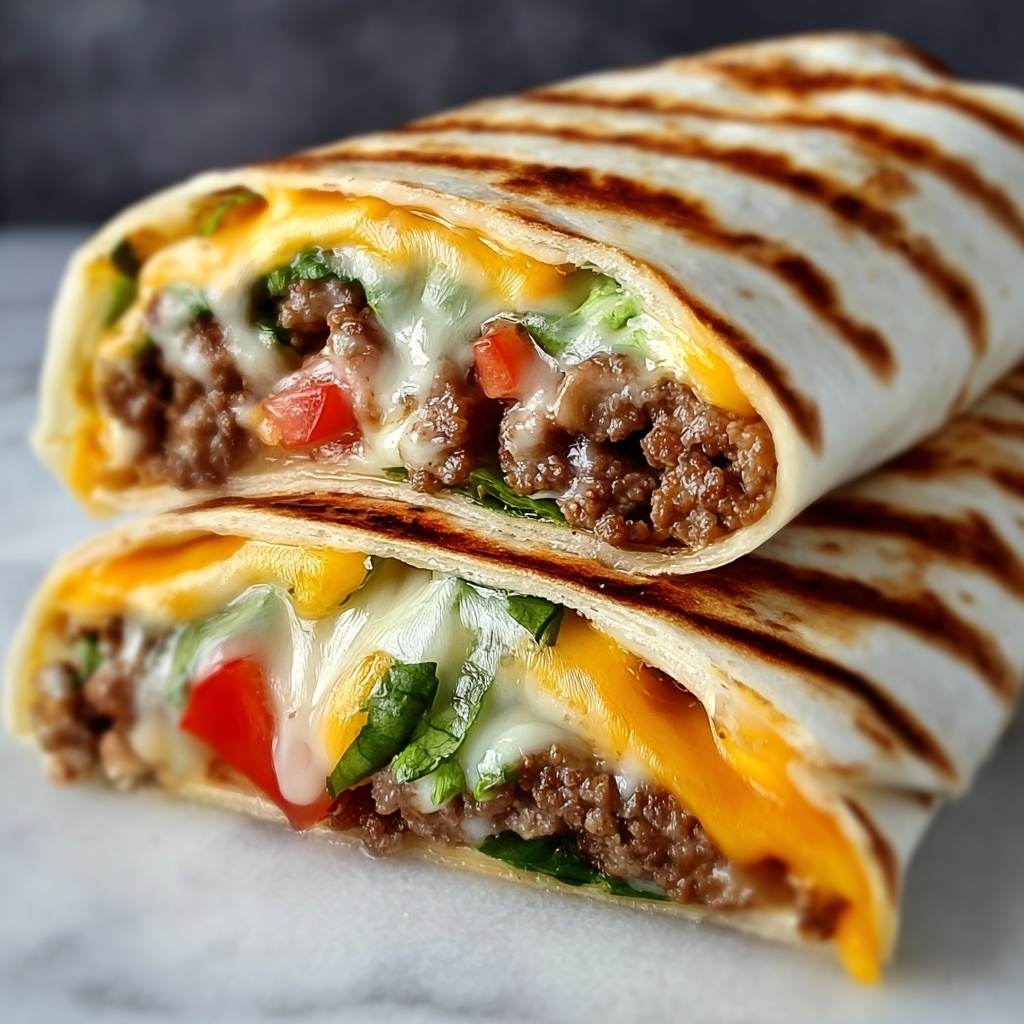
Lay a tortilla flat on your clean surface and spoon roughly a quarter of the beef mixture into the center. Sprinkle it powerfully with shredded cheddar or your preferred cheese, letting that melty magic start. Now, add any optional toppings—crisp lettuce, tangy pickles, juicy tomato slices, or your favorite sauces like ketchup or mayo—to personalize your creation. Fold the sides over carefully, then roll it up tight like a burrito, making sure all that delicious filling stays put for grilling.
Step 3: Grill the Wraps
Heat a clean skillet or griddle to medium and brush the outside of each wrap with melted butter or olive oil; this little step is key for that gorgeous golden-brown, crisp exterior. Place the wraps seam-side down in the pan to secure the roll, cooking about 2 to 3 minutes per side. When both sides are crisp and the cheese inside has melted, you’ll know they’re ready. This grilling step brings a satisfyingly crunchy contrast to the soft, gooey filling inside.
Step 4: Serve and Enjoy
Remove the wraps from the heat and let them cool just enough to handle, about a minute. Slice each wrap in half to reveal the melty, cheesy interior packed with savory beef and fresh toppings. Serve with your favorite dipping sauces like ketchup or mustard on the side for extra flavor fun. These wraps are not only delicious but also designed to impress your family or friends with a clever, handheld twist on classic cheeseburgers.
How to Serve Grilled Cheeseburger Wraps: A Fun Twist on a Classic Recipe
Garnishes
Adding a few garnishes can elevate your wraps from simply tasty to downright irresistible. Think fresh shredded lettuce for crunch, juicy tomato slices for a pop of color, or tangy pickles to brighten up the rich flavors. A drizzle of mustard or a dab of creamy mayo on each bite rounds things out perfectly.
Side Dishes
These wraps pair wonderfully with classic sides like crispy fries or crunchy coleslaw. For a lighter touch, serve with a fresh garden salad or some roasted veggie sticks. You can balance the richness of the grilled wraps with something bright and refreshing to keep the meal feeling satisfying but not heavy.
Creative Ways to Present
Want to impress at your next gathering? Serve each wrap sliced on a platter, arranged like little grilled pinwheels that invite everyone to dig in. Wrap them in parchment paper or foil for an easy picnic or party finger food option. You can even set up a “wrap bar” where guests customize their own fillings and toppings before you grill them up fresh. It’s an interactive way to enjoy this fun twist on a classic.
Make Ahead and Storage
Storing Leftovers
If you have any leftover Grilled Cheeseburger Wraps: A Fun Twist on a Classic Recipe, simply let them cool completely and store in an airtight container in the refrigerator. They will stay fresh for up to 3 days, making them a perfect quick lunch or dinner option for busy days.
Freezing
To keep these wraps longer, you can freeze them. Wrap each one tightly in plastic wrap and then place them in a freezer-safe bag or container. When frozen properly, they’ll keep well for up to 2 months. Just remember to thaw them overnight in the fridge before reheating.
Reheating
For reheating, the best way to revive that crispy exterior is to warm the wraps in a skillet over medium heat for a few minutes on each side until heated through. You can also use an oven set at 350°F (175°C) for about 10-15 minutes. Avoid microwaving directly, as it may make the tortilla soggy and less enjoyable.
FAQs
Can I use ground turkey instead of beef?
Absolutely! Ground turkey is a great leaner alternative that works wonderfully in Grilled Cheeseburger Wraps: A Fun Twist on a Classic Recipe. Just be sure to season it well to keep the flavors robust.
What type of cheese works best in these wraps?
Cheddar cheese is a classic choice because it melts beautifully and complements the beef flavor. However, feel free to experiment with mozzarella, pepper jack, or even a blend depending on your taste preferences.
Can I make these wraps vegetarian?
Yes, you can swap the ground beef for a plant-based protein like seasoned lentils, crumbled tofu, or a meat substitute to create a vegetarian version that still packs flavor and texture.
Are these wraps freezer-friendly?
Definitely! Grilled Cheeseburger Wraps: A Fun Twist on a Classic Recipe freeze well. Just wrap them tightly before freezing, then thaw and reheat as needed for an easy meal prep option.
What’s the best way to keep the wraps from falling apart?
Make sure to not overfill your tortillas, and tuck the sides in tightly when rolling up the wraps. Grilling them seam-side down first helps seal everything together so the filling stays put as you cook and eat.
Final Thoughts
If you’re looking for a fun, tasty, and super satisfying way to enjoy all the flavors of a cheeseburger without the bun, these Grilled Cheeseburger Wraps: A Fun Twist on a Classic Recipe are your new go-to. Quick to make, endlessly customizable, and bursting with flavor, they’re perfect for busy weeknights or casual gatherings. Don’t wait to give this creative spin a try—you’ll wonder how you ever enjoyed cheeseburgers any other way!
Print
Grilled Cheeseburger Wraps: A Fun Twist on a Classic Recipe
- Prep Time: 10 minutes
- Cook Time: 20 minutes
- Total Time: 30 minutes
- Yield: 4 servings
- Category: Lunch
- Method: Frying
- Cuisine: American
Description
Grilled Cheeseburger Wraps offer a delicious and fun twist on the classic cheeseburger by wrapping seasoned ground beef and melted cheddar cheese in a warm, crispy tortilla. Perfectly grilled to golden perfection, these wraps are customizable with your favorite toppings and condiments for a satisfying meal ready in just 30 minutes.
Ingredients
Main Ingredients
- 1 lb ground beef (or ground turkey)
- 1 small onion, finely chopped
- 1 tablespoon Worcestershire sauce
- 1 teaspoon garlic powder
- Salt and pepper, to taste
- 1 cup shredded cheddar cheese (or your favorite cheese)
- 4 large flour tortillas
Optional Toppings
- Sliced pickles
- Lettuce
- Tomato
- Ketchup
- Mustard
- Mayo
For Grilling
- 1 tablespoon butter or olive oil
Instructions
- Cook the Beef: In a skillet over medium heat, cook the ground beef until browned, then drain any excess fat. Add the finely chopped onion, Worcestershire sauce, garlic powder, salt, and pepper. Continue cooking for about 5 minutes until the onion is softened and beef is fully cooked. Remove from heat.
- Assemble the Wraps: Lay a tortilla flat and spoon 1/4 of the cooked beef mixture in the center. Sprinkle with shredded cheddar cheese and add any optional toppings like pickles, lettuce, or tomatoes. Fold the sides over the filling and roll tightly like a burrito, tucking in the sides.
- Grill the Wraps: Heat a skillet or griddle over medium heat. Brush the outside of each wrap with melted butter or olive oil. Place wraps seam-side down in the skillet and cook for 2-3 minutes per side until golden brown and crispy.
- Serve: Remove the wraps from heat, let them cool for a minute, then slice in half. Serve with ketchup, mustard, or your favorite dipping sauce on the side.
Notes
- You can substitute ground turkey for a leaner alternative.
- Feel free to customize the toppings with your favorites for added flavor and texture.
- Ensure the wraps are sealed well before grilling to prevent filling from spilling out.
- Use a non-stick skillet or cast iron for best grilling results.
- For a gluten-free version, substitute flour tortillas with gluten-free wraps.

