“`html
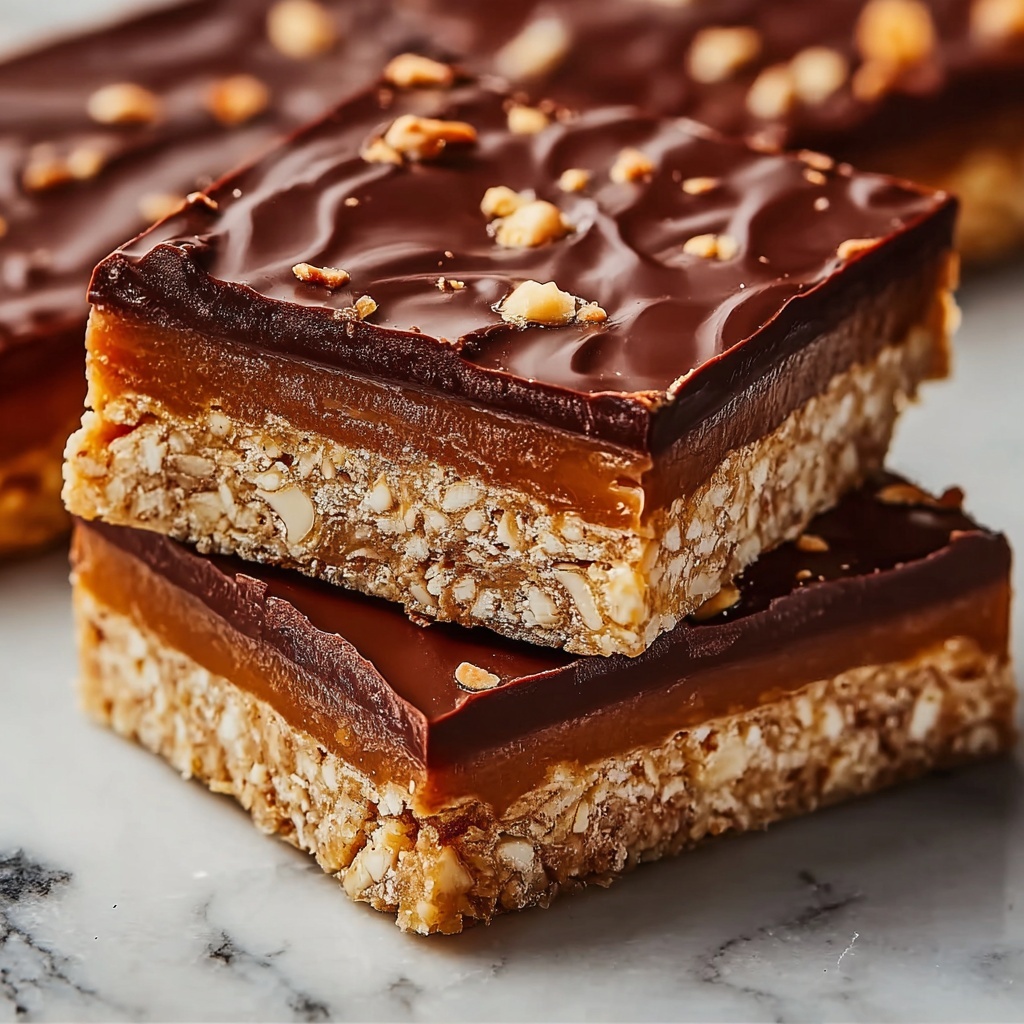
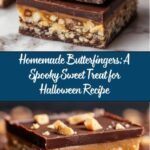
If you’re craving an irresistibly crunchy, sweet, and nostalgic candy bar experience with a fun Halloween twist, look no further than this Homemade Butterfingers: A Spooky Sweet Treat for Halloween Recipe. This clever recipe combines the perfect balance of crispy corn flakes, luscious peanut butter, and rich dark chocolate to create bars that are delightfully textured and bursting with flavor. It’s a simple, homemade way to recreate that classic candy bar magic—and a perfect treat to share during spooky season or any time you want a bite of something truly special.

Ingredients You’ll Need
These ingredients are amazingly straightforward, yet each one plays a crucial role in nailing that authentic Butterfinger crunch and taste. From the crispy corn flakes providing the signature texture to the molasses adding a deep, rich undertone, everything here works in perfect harmony.
- 2 cups corn flakes (or corn chex cereal): The base of the bars, giving that essential crunch and lightness.
- 3/4 cup peanut butter: For creamy, nutty richness that holds everything together.
- 1/4 cup pure maple syrup: Adds natural sweetness with a subtle depth that’s better than plain sugar.
- 1 tsp blackstrap molasses (or regular molasses): A flavor powerhouse that adds warmth and complexity.
- Pinch of salt (more if your peanut butter isn’t salted): Essential for balancing all the sweetness and enhancing flavors.
- 1 cup dark chocolate chips: The decadent coating that makes this candy bar truly indulgent.
- 2 tsp butter: Helps create a smooth, glossy chocolate topping that sets beautifully.
How to Make Homemade Butterfingers: A Spooky Sweet Treat for Halloween Recipe
Step 1: Crush the Corn Flakes
Start by placing your corn flakes in a ziplock bag or a bowl and gently crush them into small, fine pieces, but be careful not to pulverize them into powder. You want to keep a little texture and crunch so each bite retains that classic buttery crispiness that defines a Butterfinger.
Step 2: Melt the Peanut Butter Mixture
In a small pot over medium-low heat, combine the peanut butter, pure maple syrup, and molasses. Stir steadily until the mixture becomes smooth and beautifully blended. Be mindful not to let it scorch. If you prefer, warming this in the microwave in 20-30 second bursts works just as well. Finally, add a pinch of salt or more if your peanut butter isn’t salted, and stir again to perfectly balance the sweetness.
Step 3: Combine Wet and Dry Ingredients
Pour the melted peanut butter mixture over the crushed corn flakes in a large bowl. Use a sturdy spoon or spatula to fold everything together until the flakes are evenly coated with that glossy, sweet peanut butter mix, ensuring every bite will have that perfect flavor and crunch.
Step 4: Press and Chill the Mixture
Line a loaf pan with parchment paper and transfer your combined mixture into it. Press down firmly with your hands or a spatula to pack it tightly and evenly across the pan. This step is key to achieving bars that hold their shape. Pop the pan into the freezer and chill for 45 to 60 minutes, or longer if you’d like, allowing the bars to firm up nicely.
Step 5: Melt the Chocolate Coating
While your bars are chilling, melt the dark chocolate chips and butter together in a microwave-safe bowl. Heat in 30-second intervals, stirring in between to prevent burning, until the chocolate is silky and smooth. This luscious coating will envelop each bar with a rich, shiny finish perfect for Halloween festivities.
Step 6: Slice, Dip, and Set
Once the bars have fully chilled, lift them out using the parchment paper and cut into 12 delicious servings. One by one, dip each bar into the melted chocolate, ensuring a complete, even coating. Place the dipped bars onto a parchment-lined surface and refrigerate them for 30 to 60 minutes until the chocolate hardens. Then, get ready to enjoy your homemade candy masterpiece!
How to Serve Homemade Butterfingers: A Spooky Sweet Treat for Halloween Recipe

Garnishes
For an extra spooky flair, consider sprinkling the chocolate coating with edible glitter, crushed Halloween-themed candy, or even tiny candy eyes before the chocolate sets. These fun touches will wow guests and add a festive, playful vibe perfect for Halloween parties.
Side Dishes
Serve these bars alongside a cup of rich hot cocoa or a frothy pumpkin spice latte to complement their sweetness. Fresh apple slices or crunchy celery sticks also provide a nice balance if you want something crisp and refreshing alongside your candy bars.
Creative Ways to Present
Wrap the bars individually in colorful parchment paper or cellophane bags tied with orange and black ribbons to gift them to friends and family. For a party spread, arrange them on a decorative Halloween platter alongside other themed treats like caramel apples and ghost-shaped cookies for a truly spooky sweet table.
Make Ahead and Storage
Storing Leftovers
Keep any leftover Homemade Butterfingers: A Spooky Sweet Treat for Halloween Recipe bars in an airtight container in the refrigerator. They will stay perfectly fresh and maintain their crunch for up to one week, making them an excellent grab-and-go snack.
Freezing
You can freeze these bars to extend their shelf life up to three months. Wrap each bar tightly in plastic wrap and place in a freezer-safe bag or container. When you’re ready to enjoy, thaw them overnight in the fridge to preserve their texture and flavor.
Reheating
Since these bars are best enjoyed cold or at room temperature, reheating isn’t usually necessary. If the chocolate coating feels too firm after refrigeration, let the bars sit at room temperature for 10-15 minutes before serving to soften slightly without melting the chocolate completely.
FAQs
Can I substitute the corn flakes with another cereal?
Absolutely! Corn chex or other similar crispy cereals work wonderfully as alternatives. Just make sure whatever you use has a neutral flavor and crisp texture to mimic that classic Butterfinger crunch.
Is it possible to make this recipe nut-free?
If you have a nut allergy, you could try swapping peanut butter for a seed butter like sunflower seed butter. Keep in mind the flavor will be different, but the texture and sweetness balance will still be delightful.
What type of chocolate works best for the coating?
Dark chocolate chips create the perfect balance with the sweet and salty bar filling. However, milk chocolate or semi-sweet chocolate will also work if you prefer a sweeter finish.
Can I make smaller or larger bars?
Yes, the recipe is quite flexible! Just adjust the size to your liking when slicing after chilling. Smaller bars work great for bite-sized treats, while larger ones satisfy bigger sweet tooth cravings.
How do I keep the bars from melting too quickly?
Storing them in the fridge or freezer helps the bars stay firm, especially if your environment is warm. Also, make sure the chocolate coating is completely set before handling or serving for the best results.
Final Thoughts
There’s something so satisfying about making Homemade Butterfingers: A Spooky Sweet Treat for Halloween Recipe right in your own kitchen. With its crunchy layers, peanut buttery goodness, and rich chocolate coating, this recipe is a guaranteed crowd-pleaser and a wonderful way to celebrate the season. I hope you have as much fun making and sharing these bars as I do—trust me, they’re a guaranteed treat for both kids and grown-ups alike!
“`
Print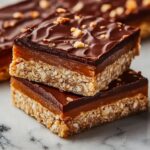
Homemade Butterfingers: A Spooky Sweet Treat for Halloween Recipe
- Prep Time: 15 minutes
- Cook Time: 0 minutes
- Total Time: 1 hour (includes chilling time)
- Yield: 12 servings
- Category: Candy
- Method: No-Cook
- Cuisine: American
Description
These Homemade Butterfingers are a deliciously crunchy and sweet treat, perfect for Halloween or any time you crave a nostalgic candy bar. Made with corn flakes, rich peanut butter, pure maple syrup, and drizzled in dark chocolate, they offer a perfect balance of texture and flavor. Easy to prepare and no baking required, these bars can be customized and chilled to set for a delightful homemade candy experience.
Ingredients
Dry Ingredients
- 2 cups corn flakes (or corn chex cereal)
- Pinch of salt (more if your peanut butter isn’t salted)
Wet Ingredients
- 3/4 cup peanut butter
- 1/4 cup pure maple syrup
- 1 tsp blackstrap molasses (or regular molasses)
Chocolate Coating
- 1 cup dark chocolate chips
- 2 tsp butter
Instructions
- Crush the Corn Flakes: Add the corn flakes to a ziplock bag or a bowl and crush them until you have small, fine pieces. Be sure not to pulverize them into powder, as the texture and crunch are essential for the bars.
- Melt Wet Ingredients: In a small pot over medium-low heat, combine peanut butter, maple syrup, and molasses. Stir continuously until everything is smoothly melted and combined, taking care not to burn the mixture. Add a pinch of salt (adjust depending on peanut butter saltiness) and stir again. Alternatively, melt the mixture in the microwave in 20-30 second increments, stirring between intervals.
- Combine Mixtures: Pour the melted peanut butter mixture over the crushed corn flakes in a large bowl. Stir thoroughly until the dry and wet ingredients are evenly combined and coated.
- Shape and Chill: Transfer the mixture into a parchment-lined loaf pan. Press it down firmly and evenly to compact the bars. Place the pan in the freezer for 45–60 minutes, or for best results, chill overnight.
- Melt Chocolate Coating: When the bars are nearly chilled, combine the dark chocolate chips and butter in a microwave-safe bowl. Microwave in 30-second increments, stirring well after each to avoid burning, until fully melted and smooth.
- Dip and Set Bars: Remove the chilled bars from the pan and cut them into individual bars. Dip each bar into the melted chocolate coating, then place them on a parchment-lined tray or plate. Refrigerate until the chocolate sets, about 30 to 60 minutes. Enjoy your homemade Butterfingers!
Notes
- Use corn chex cereal as a gluten-free alternative to corn flakes if needed.
- Adjust salt according to the saltiness of your peanut butter to balance flavor.
- For a vegan version, use dairy-free chocolate and vegan butter or coconut oil.
- Store finished bars in the refrigerator for up to one week or freeze for longer storage.
- Microwaving the peanut butter mixture is a faster alternative to stovetop melting.


