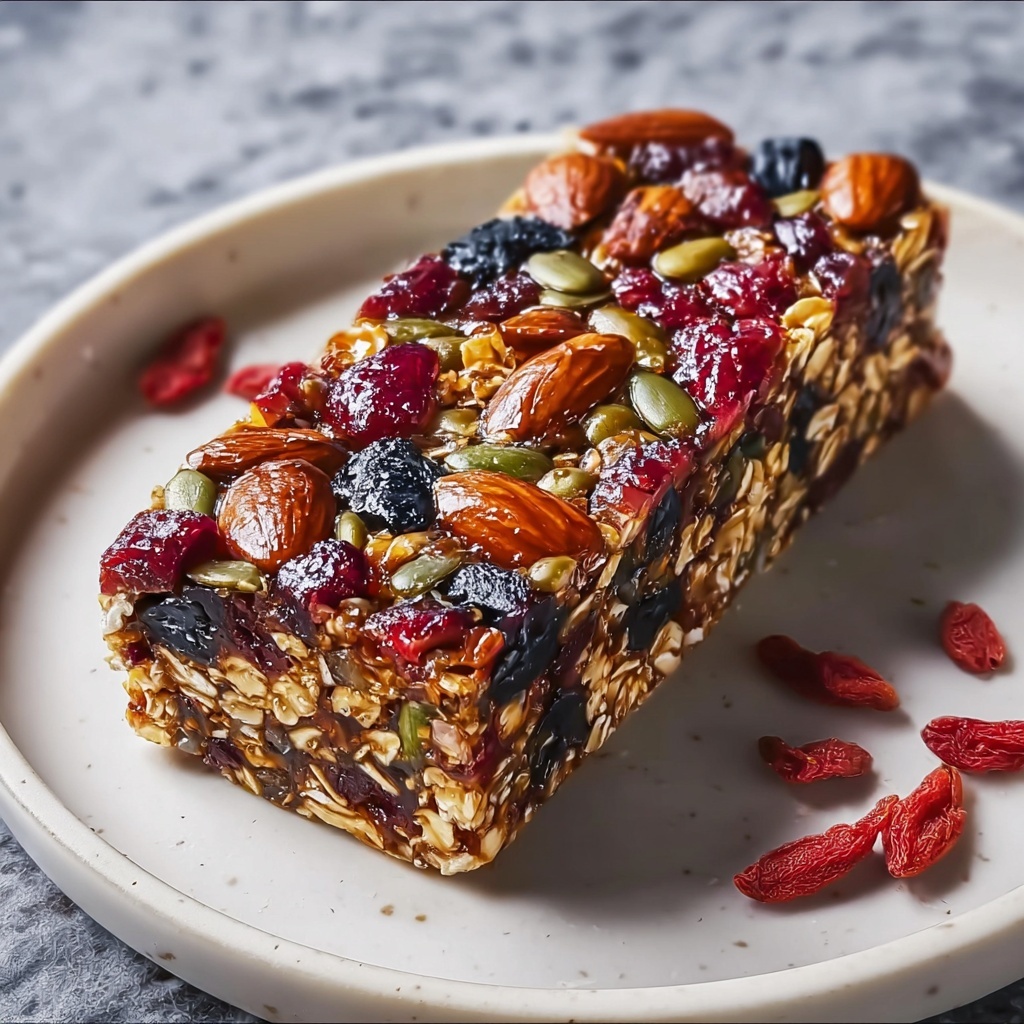
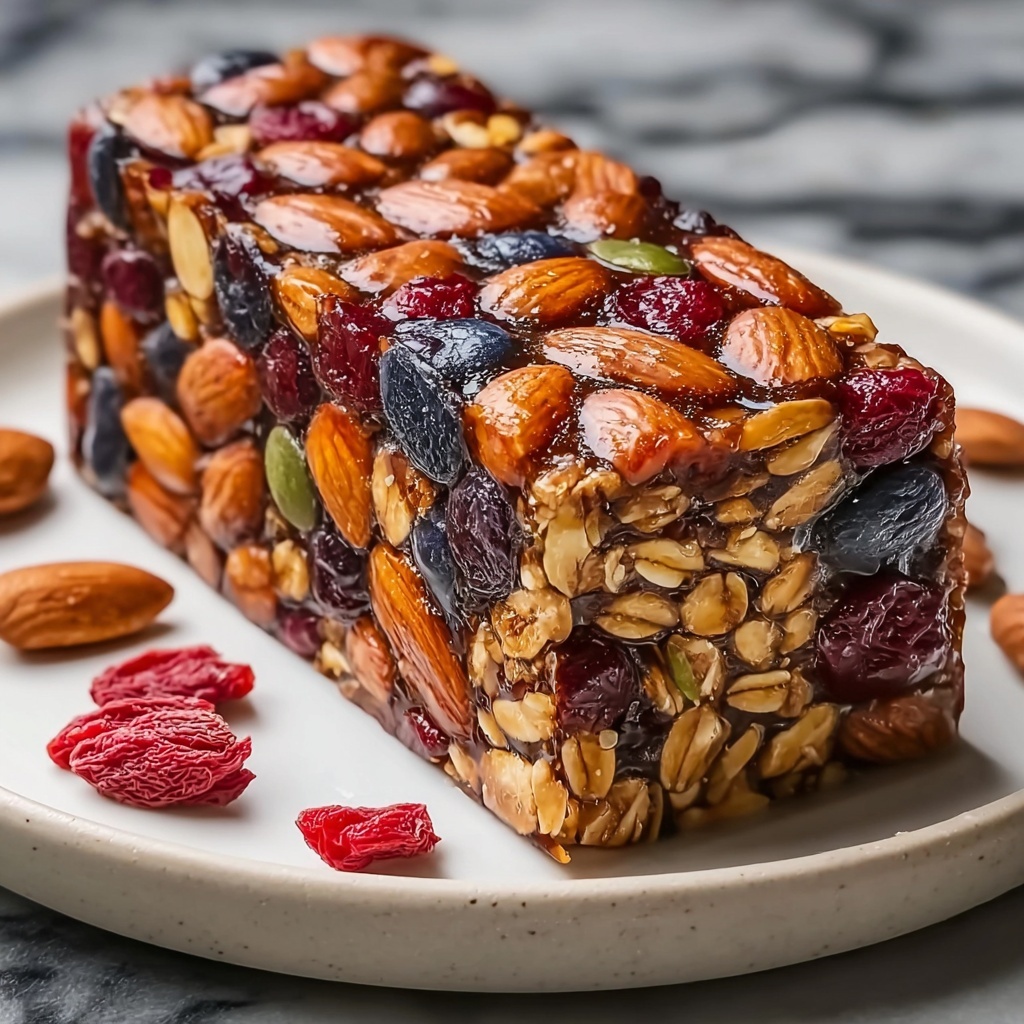
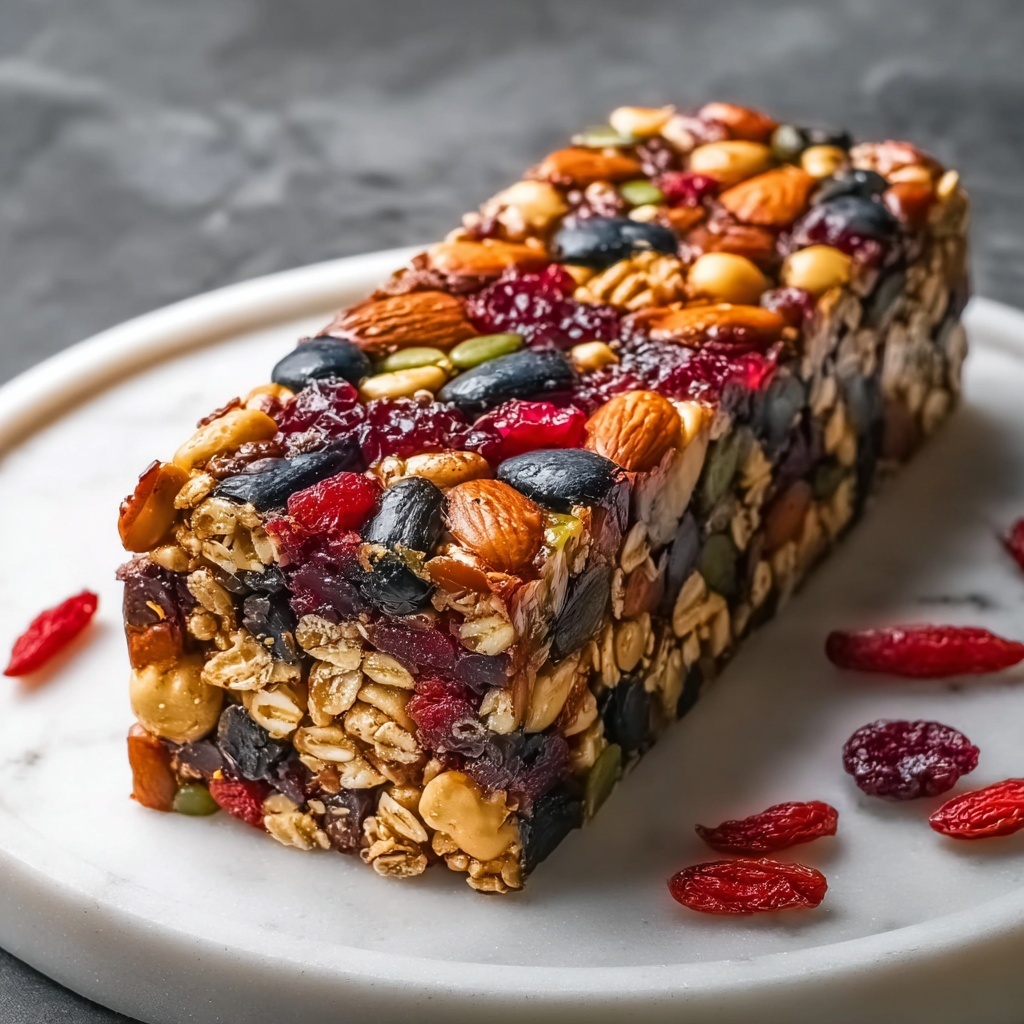
If you are on the lookout for a wholesome, powerful snack to fuel your day, look no further than this Homemade Energy Bars Packed with Strength and Energy Recipe. Bursting with a fantastic mix of nuts, seeds, dates, and a touch of honey, these bars deliver a perfect harmony of flavors and textures that keep your energy soaring and hunger at bay. They are not only delicious and satisfying but also a smart choice to prepare ahead when you need quick nourishment during hectic days or post-workout recovery. Trust me, once you try these bars, you will wonder how you ever managed without them!
Ingredients You’ll Need
These ingredients are simple pantry staples but essential to create the perfect balance of crunch, sweetness, and richness in your homemade bars. Each plays its own star role in crafting layers of taste and texture that make these bars truly irresistible.
- Cashews (70g / ½ cup): Adds a creamy, buttery crunch that blends beautifully with other nuts.
- Walnuts (70g / ½ cup): Offers a slightly bitter edge to balance the sweetness while packing omega-3 goodness.
- Almonds (70g / ½ cup): Brings a satisfying crispness and a subtle nutty flavor.
- Pine nuts (40g / ¼ cup): Their delicate, sweet flavor adds a unique touch to the mix.
- Hazelnuts (70g / ½ cup): Contributes a rich, warm taste that complements the honey perfectly.
- Pumpkin seeds (70g / ⅓ cup): Roasted until they pop for a burst of savory crunchiness.
- Dates (150g / 1 cup), pitted: Serve as the natural sweetener and binder, giving chewiness and caramel notes.
- Oatmeal (50g / ½ cup): Adds a hearty texture with a mild nutty flavor and helps hold the bars together.
- Olive oil (3 tablespoons): Enhances richness and aids in combining all ingredients smoothly.
- Salt (½ teaspoon): Balances sweetness, elevating flavors throughout the bars.
- Honey (160ml / ½ cup): Provides natural sweetness with a floral depth, while helping bind the mixture.
How to Make Homemade Energy Bars Packed with Strength and Energy Recipe
Step 1: Roast the Nuts
Begin by warming a dry frying pan over medium heat, then roast the cashews, walnuts, almonds, pine nuts, and hazelnuts for several minutes until you can smell their nutty aroma and they take on a light golden hue. This simple roasting step awakens the nuts’ natural oils, dramatically boosting their flavor and crunch. Once done, transfer them to a bowl to cool.
Step 2: Pop the Pumpkin Seeds
In the same pan, roast the pumpkin seeds until they start to pop, which usually happens after a few minutes. This step intensifies their nutty flavor and adds a satisfying crispness that will shine through in the final bars. Set these aside with the other nuts.
Step 3: Soften the Dates
Place the pitted dates in cold water and let them soak for about 15 minutes. This softening process helps create a sticky, pliable texture that’s essential for binding all the bars’ ingredients. After soaking, drain and roughly chop the dates into smaller pieces for easier cooking.
Step 4: Prepare the Oatmeal
Using a food processor or mixer, pulse the oatmeal briefly to break it down into finer bits, but make sure to retain some small pieces for that lovely texture contrast later on in the bars. This step ensures the bars hold together without becoming mushy.
Step 5: Cook the Dates
Heat 3 tablespoons of olive oil in a frying pan over medium heat. Add the chopped dates and cook, stirring frequently, for about 5 minutes. You’ll notice them softening further and starting to break down, releasing their natural sweetness. This step melds flavors and allows the dates to act as a natural glue for the bars.
Step 6: Combine Nuts, Seeds, and Oats
Add the roasted nuts, popped pumpkin seeds, and processed oats into the pan with the softened dates. Stir everything together thoroughly to achieve a well-unified mixture that’s ready to be sweetened and seasoned.
Step 7: Season and Sweeten
Sprinkle in the ½ teaspoon of salt to enhance the overall flavor, then pour in 160ml of honey, gently mixing everything together. Be careful not to heat the honey too long to preserve its natural nutrients and floral notes. This luscious combination is the heart of your delicious energy bars.
Step 8: Press and Chill
Line a baking dish or mold with parchment paper greased with olive oil or use siliconized parchment for easy removal. Press the mixture firmly into the dish using the back of a spoon or your hands, making sure it’s compact and evenly spread. Let it cool at room temperature for a bit, then pop it into the refrigerator for at least 1 hour to firm up nicely.
Step 9: Cut and Final Chill
Once cooled and firm, use a wet knife to carefully cut the mixture into individual bars. Returning the bars to the refrigerator for an additional 30 minutes helps them fully set, giving them that perfect chew and hold.
Step 10: Wrap and Store
Wrap each bar individually in cling film for convenience. Storing them in the refrigerator keeps them fresh, making it super easy to grab a healthy snack on the go, or freeze some to enjoy later.
How to Serve Homemade Energy Bars Packed with Strength and Energy Recipe
Garnishes
For a fun and inviting twist, sprinkle a little extra chopped nuts or a dusting of cinnamon on top before cutting. You could even drizzle a bit of dark chocolate or nut butter to make the bars feel extra decadent without losing their nourishing qualities.
Side Dishes
These energy bars pair beautifully with fresh fruits like apples or bananas to create a balanced snack packed with vitamins and fiber. A side of Greek yogurt also adds creaminess and a protein kick to keep you fully energized.
Creative Ways to Present
If you’re packing these for a picnic or gifting them to friends, try wrapping each bar in colorful parchment paper or reusable wax wraps tied with a ribbon. You can also cut them into bite-sized squares and serve with espresso or herbal tea for a delightful afternoon boost.
Make Ahead and Storage
Storing Leftovers
Keep your homemade bars wrapped individually and stored in an airtight container in the refrigerator. They stay fresh and flavorful for up to two weeks, making them a perfect prep-ahead snack for busy days.
Freezing
To extend their shelf life, these bars freeze beautifully. Just place the wrapped bars in a freezer-safe bag or container and freeze for up to three months. When you’re ready to enjoy, simply thaw them in the fridge overnight for a quick, energizing treat.
Reheating
While these bars are fantastic eaten cold, you can warm them slightly in the microwave for 10–15 seconds if you prefer a softer texture. Just be sure not to overheat as it can alter their taste and texture.
FAQs
Can I substitute the nuts in this Homemade Energy Bars Packed with Strength and Energy Recipe?
Absolutely! Feel free to swap any nuts you’re not a fan of or allergic to with others like pecans, macadamia nuts, or even sunflower seeds. Just try to keep the total quantity and roasting time similar to maintain the right texture and flavor.
Are these bars suitable for vegans?
This particular recipe uses honey, which some vegans avoid. You can replace honey with maple syrup or agave nectar to keep the bars vegan-friendly without losing sweetness or binding ability.
How long do Homemade Energy Bars Packed with Strength and Energy Recipe last?
When stored properly in the refrigerator, these bars last up to two weeks. If freezing, they can be kept good for up to three months, making them ideal for batch preparation.
Can I make this recipe nut-free?
Yes, by substituting the nuts with seeds such as sunflower, chia, and flaxseeds, you can create a nut-free version. The texture will be slightly different but still delicious and energizing.
Is it necessary to roast the nuts and seeds?
Roasting the nuts and seeds intensifies their flavor and improves the overall crunch, adding depth to the bars. While you can skip this step, the final taste may be milder and less complex.
Final Thoughts
If you want a delicious, homemade snack that’s both satisfying and energizing, I wholeheartedly recommend trying this Homemade Energy Bars Packed with Strength and Energy Recipe. It’s a fantastic way to enjoy the power of nuts, seeds, and natural sweeteners in a convenient bar that you can grab anytime. Once you make these bars, they’ll quickly become your go-to snack for busy mornings, afternoon cravings, or pre- and post-workout fuel. Give it a shot—you will not regret it!
Print
Homemade Energy Bars Packed with Strength and Energy Recipe
- Prep Time: 10 minutes
- Cook Time: 15 minutes
- Total Time: 25 minutes
- Yield: 12 servings
- Category: Snacks
- Method: Stovetop
- Cuisine: International
- Diet: Vegetarian
Description
This recipe for Homemade Energy Bars is a nutrient-packed, wholesome snack made from a blend of roasted nuts, seeds, dates, oatmeal, olive oil, and honey. These bars offer a perfect balance of strength and energy, ideal for a quick pick-me-up or post-workout fuel. The nuts are gently toasted to enhance their flavor, combined with naturally sweet dates and honey, and bound together with oatmeal for texture. The bars are not baked; instead, they are chilled to set, making this a no-bake, stovetop-prepared nutritious treat.
Ingredients
Nuts and Seeds
- 70g (½ cup) cashews
- 70g (½ cup) walnuts
- 70g (½ cup) almonds
- 40g (¼ cup) pine nuts
- 70g (½ cup) hazelnuts
- 70g (⅓ cup) pumpkin seeds
Others
- 150g (1 cup) dates, pitted
- 50g (½ cup) oatmeal
- 3 tablespoons olive oil
- ½ teaspoon salt
- 160ml (½ cup) honey
Instructions
- Roast the Nuts: In a dry frying pan over medium heat, lightly roast the cashews, walnuts, almonds, pine nuts, and hazelnuts until they become fragrant and slightly golden. Remove from the pan and set aside.
- Roast the Pumpkin Seeds: In the same dry pan, roast the pumpkin seeds for a few minutes until they begin to pop. Set aside.
- Soften the Dates: Soak the pitted dates in cold water for 15 minutes to soften them, making them easier to blend and cook.
- Prepare the Dates: Drain the soaked dates, remove any pits if necessary, and chop them into small pieces.
- Process the Oatmeal: Pulse the oatmeal in a food processor or mixer until it has a finer texture but still retains some small pieces for added texture.
- Heat Olive Oil: Warm 3 tablespoons of olive oil over medium heat in a frying pan to prepare for cooking the dates.
- Cook the Dates: Add the chopped dates to the heated olive oil and cook, stirring frequently for about 5 minutes, until they soften and start to break down.
- Combine Ingredients: Add the roasted nuts, pumpkin seeds, and processed oatmeal to the softened dates in the pan. Stir well to combine all ingredients evenly.
- Add Salt and Honey: Stir in ½ teaspoon of salt and pour in 160ml of honey. Mix carefully to combine without heating the honey excessively, preserving its nutrients.
- Prepare the Molding Dish: Line a baking dish or mold with parchment paper greased lightly with olive oil or use siliconized parchment paper to facilitate removal later.
- Press the Mixture: Firmly press the combined mixture into the lined dish using the back of a spoon or your hands to make an even and compact layer.
- Cool and Refrigerate: Allow the mixture to cool to room temperature, then refrigerate it for 1 hour to firm up.
- Cut into Bars: After chilling, use a wet knife to cut the mixture into individual energy bars of your desired size.
- Final Chill: Return the cut bars to the refrigerator for an additional 30 minutes to fully set them.
- Store Properly: Wrap each bar individually in cling film for convenience and store in the refrigerator for freshness or freeze for longer storage.
Notes
- The roasting of nuts and seeds can be done carefully to avoid burning; watch closely as they can brown quickly.
- Use siliconized parchment paper if available for easier removal of bars from the mold.
- Chilling times are crucial to ensure the bars hold together well and have the proper texture.
- Wrap bars individually to avoid sticking and for easy portability.
- These bars are best stored refrigerated but can be frozen for up to 1 month.
- Adjust honey quantity to taste or substitute with maple syrup for a vegan alternative (note this changes the diet classification).


